Integrating an AI assistant
This guide will give you the information you need to integrate ChatGPT-powered chatbot into your application.
ChatGPT is a powerful language model that can be easily integrated into your ChatKitty chat app, allowing you to create a seamless AI assistant experience for your users. This guide will provide you with all the necessary information to build a chat app with ChatGPT, including and step-by-step instructions for integrating ChatGPT into your chat app. By the end of this guide, you'll be able to provide your users with a more engaging and personalized experience, while also improving the efficiency of your business or organization.
We'll be extending the ChatKitty platform using a chat function. Chat functions let us extend ChatKitty by handling chat events with additional logic. In this case, we'll be using the ChatGPT API via the openai NPM package in our chat function to respond to user messages replying as ChatGPT.
With ChatGPT your AI assistant can help your users draft emails, write code, answer questions, translate messages, summarize chats, and much more we leave to you to imagine.
Check out our Expo Snack to try a working example of this guide on your browser.
You'll need to replace '<YOUR CHATKITTY API KEY HERE>' with a ChatKitty API key. You can create a free account here.
Anything developers build on ChatKitty needs to be associated with a ChatKitty project. If this is your first time creating a ChatKitty project, checkout our step-by-step getting started guide, which will walk you through creating your ChatKitty project.
Creating an assistant user
In this example, we'll create a user to send text messages generated by ChatGPT. You can create chat users using the Platform API.
We'll give this user a username "assistant", and a human-readable name users can use to refer to ChatGPT.
With cURL
curl --location --request 'POST' \
  'https://api.chatkitty.com/v1/users' \
  -H 'accept: application/json' \
  -H 'Authorization: Bearer ACCESS-TOKEN' \
  -H 'Content-Type: application/json' \
  -d '{
  "name": "assistant",
  "displayName": "Ava (ChatGPT)",
  "isGuest": false
}'
The create-user response should look like this
{
  "id": 280753,
  "type": "PERSON",
  "name": "assistant",
  "displayName": "Ava (ChatGPT)",
  "displayPictureUrl": "https://api.chatkitty.com/v1/picture/Ava+%28ChatGPT%29",
  "presence": {
    "status": "UNAVAILABLE",
    "online": false
  },
  "properties": {}
}
Replace ACCESS-TOKEN with an OAuth V2 access token issued for your application.
Creating an OpenAI account
You'll need an OpenAI account to use the ChatGPT API.
Phone verification is required when creating an OpenAI account.
Creating an OpenAI secret key
You'll need an OpenAI secret key to make API calls. After creating your account, you can create a secret key from the "API Keys" OpenAI dashboard section. You can find the "API Keys" section by clicking "View API keys" from the account dropdown.
Generate a secret key and keep it safe, we'll be integrating it into our chat function.
Adding OpenAI to your chat function runtime
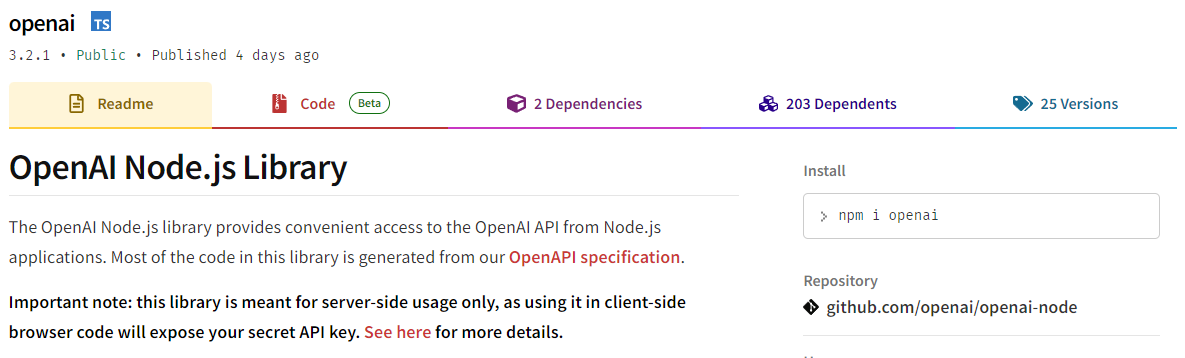
We'll be using the official OpenAI Node.js library to interact with ChatGPT. Chat functions run in a secure Node.js runtime, implemented on top of AWS Lambda.
The library is meant for server-side usage only and requires an OpenAI secret API key. Chat functions run on isolated cloud infrastructure so secrets can safely be used without exposing credentials to browser code.
Add the openai NPM package to your chat runtime
using the ChatKitty dashboard.
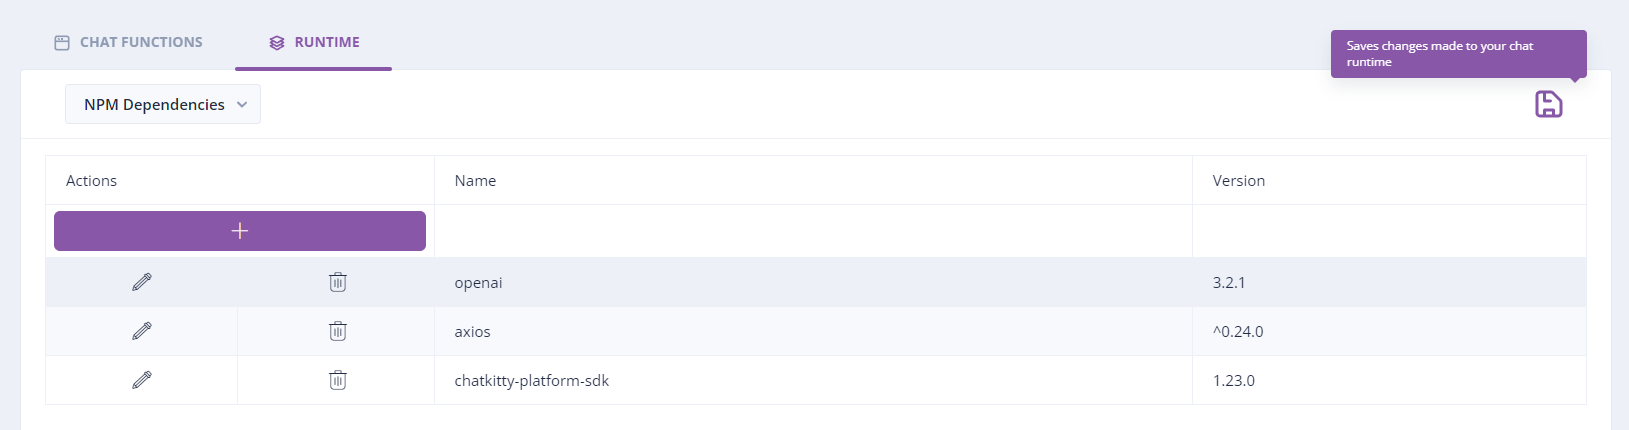
Remember to click the "Save" icon to confirm your chat runtime dependencies changes.
Setting up user chat sessions
In your front-end client app, with a ChatKitty connection established, create a direct channel we'll use to direct message (DM) the ChatGPT bot. Later we'll define a chat function to respond to messages sent by users.
// Creates or retrieves a direct channel with 'assistant'
const result = await chatkitty.createChannel({
  type: 'DIRECT',
  members: [{ username: 'assistant' }]
});

if (result.succeeded) {
  const channel = result.channel; // Handle channel
}

if (result.failed) {
  const error = result.error; // Handle error
}
Next, start a chat session for the channel, in the onMessageReceived
chat event handler, update your UI with the text message object created by
the chatbot.
chatkitty.startChatSession({
  channel,
  onMessageReceived: (message) => {
    // update UI with message
  }
});
To send messages as a user, use the sendMessage SDK function.
await chatkitty.sendMessage({
  channel,
  body: "What's the capital city of France?"
});
If you need help getting started with your client app, check out our JavaScript quick start guide.
Responding to user messages
In the "Chat Function" dashboard tab, select the "User sent message"
chat function. In the code editor configure an OpenAIApi instance using your secret key.
const { Configuration, OpenAIApi } = require('openai');

const configuration = new Configuration({
  apiKey: 'YOUR-OPENAPI-SECRET-KEY'
});

const openai = new OpenAIApi(configuration);
Next, let's make sure we only reply to direct messages sent to ChatGPT (and exclude messages sent by ChatGPT).
Inside the chat function handler function (async function handleEvent(event: UserSentMessageEvent, context: Context),
return early if the channel the message sent is not a direct channel or
the AI assistant user isn't a member of the channel.
We'll check for the "assistant" username we used to create the assistant user to test if the assistant is a channel member.
const channel = event.channel;

if (channel.type !== 'DIRECT' || !channel.members.find(m => m.name === 'assistant')) return;
Let's also not reply to messages sent by ChatGPT (preventing ChatGPT from talking to itself).
const user = event.user;

if (user.name === 'assistant') return;
Next, lets create a chat completion that generates the
message body for our AI assistant's response. ChatGPT uses the gpt-3.5-turbo OpenAI language model.
OpenAI chat models like gpt-3.5-turbo take a series of messages, and return a message generated by
the model. Messages must be an array of message objects, where each object has a role ("system", "user", or "assistant")
and content (the content of the message).
After our guards for invalid messages, call the openai.ChatCompletion create function,
passing a system message "instructing" ChatGPT what persona to assume, and a user message sent by the
event user. In this example, we'll instruct the language model with human friendly name "Your name is Ava.",
and instruct it to be helpful "You are a helpful assistant.".
We'll also pass a list of previous messages of the channel to give ChatGPT contextual information about the conversation.
let messages = await context.ChatKitty.Channels.listChannelMessages(event.message.channelId);

messages = messages.data['_embedded']['messages']
  .filter(m => m.type === 'TEXT')
  .map(m => ({
    'role': m.user.name === 'assistant' ? 'assistant' : 'user',
    'content': m.body
  }))
  .reverse();

const completion = await openai.createChatCompletion({
  model: 'gpt-3.5-turbo',
  messages: [
    {
      'role': 'system',
      'content': 'Your name is Ava. You are a helpful assistant.'
    },
    ...message
  ]
});
Now, we have a chat completion message from ChatGPT, we can send a message as the assistant user to the event channel from our chat function using the pre-initialized Platform SDK client included in the function's context.
await context.ChatKitty.Channels.sendChannelMessage(event.message.channelId, {
  'user': { 'username': 'assistant' },
  'type': 'TEXT',
  'body': completion.data.choices[0].message.content
});
Your entire chat function should now look like this
const { Configuration, OpenAIApi } = require('openai');

const configuration = new Configuration({
  apiKey: 'YOUR-OPENAPI-SECRET-KEY'
});

const openai = new OpenAIApi(configuration);

async function handleEvent(event: UserSentMessageEvent, context: Context) {
  const channel = event.channel;

  if (channel.type !== 'DIRECT' || !channel.members.find(m => m.name === 'assistant')) return;

  const user = event.user;

  if (user.name === 'assistant') return;

  const message = event.message;

  const completion = await openai.createChatCompletion({
    model: 'gpt-3.5-turbo',
    messages: [
      {
        'role': 'system',
        'content': 'Your name is Ava. You are a helpful assistant.'
      }, {
        'role': 'user',
        'content': message.body
      }
    ]
  });

  await context.ChatKitty.Channels.sendChannelMessage(event.message.channelId, {
    'user': { 'username': 'assistant' },
    'type': 'TEXT',
    'body': completion.data.choices[0].message.content
  });
}
Replace YOUR-OPENAPI-SECRET-KEY with your generated OpenAI secret key.
Remember to click the "Save" icon to confirm your chat function changes.
You can set API keys, secrets and other parameterizable values as chat runtime environment variables, removing them from your chat function source code. This makes testing chat functions, rotating keys, easier and is more secure.
Listing previous messages
To retrieve the channel history for a user with ChatGPT, use the listMessages SDK function
const result = await chatkitty.listMessages({ channel });

if (result.succeeded) {
  const messages = result.paginator.items;
}
Expo example
- Check out our Expo Snack