
In this tutorial series, I'll be showing you how to build a functional and secure chat app using the latest React Native libraries, the Expo framework, and Firebase, powered by the ChatKitty platform. Part 1 covers using Firebase Authentication and ChatKitty Chat Functions to securely implement user registration and login.
This is the first article of this series. After reading this article, you will be able to:
Create an Expo React Native application
Create a Firebase project for user authentication
Create a ChatKitty project and connect to ChatKitty to provide real-time chat functionality
Use Firebase Authentication and ChatKitty Chat Functions to securely implement user login
What is React Native?
React Native is a great way to develop both web and mobile applications very quickly, while sharing a lot of code when targeting multiple platforms. With a mature ecosystem of libraries and tooling, using React Native is not only fast but also reliable. Trusted by organizations like Facebook, Shopify, and Tesla - React Native is a stable framework for building both iOS and Android apps.
What is Expo?
The Expo framework builds on top of React Native to allow developers to build universal React applications in minutes. With Expo, you can develop, build, deploy and quickly iterate on iOS, Android and web apps from the same JavaScript code. Expo has made creating both web and mobile applications very accessible, handling would-be complex workflows like multi-platform deployment and advanced features like push notifications.
What is Firebase?
Firebase is a Backend-as-a-Service offering by Google. It provides developers a wide array of tools and services to develop quality apps without having to manage servers. Firebase provides key features like authentication, a real-time database, and hosting.
What are ChatKitty Chat Functions?
ChatKitty provides Chat Functions, serverless cloud functions that allow you to define custom logic for complex tasks like user authentication, and respond to chat events that happen within your application. With ChatKitty Chat Functions, there's no need for you to build a backend to develop chat apps. ChatKitty Chat Functions auto-scale for you, and only cost you when they run. Chat Functions lower the total cost of maintaining your chat app, enabling you to build more logic, faster.
Prerequisites
To develop apps with Expo and React Native, you should be able to write and understand JavaScript or TypeScript code. To define ChatKitty Chat Functions, you'll need to be familiar with basic JavaScript.
You'll need a version of Node.js above 10.x.x installed on your local machine
to build this React Native app.
You'll use the Expo CLI tool through npx.
For a complete walk-through on how to set up a development environment for Expo, you can go through the official documentation here.
You can check out our Expo React Native sample code any time on GitHub.
Now that you have all the needed background information, let's get started.
Creating project and installing libraries
First, initialize a new Expo project with the blank managed workflow. To do so, you're going to need to open a terminal window and execute:
npx create-expo-app chatkitty-example-react-native
After creating the initial application. You can enter the app root directory and run the app:
# navigate inside the project directory
cd chatkitty-example-react-native

# for android
npx expo start --android

# for ios
npx expo start --ios

# for web
npx expo start --web
If you run your newly created React Native application using Expo, you should see:
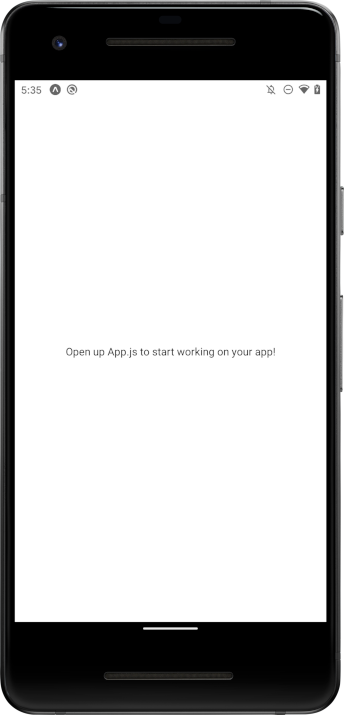
Now that we have our blank project, we can install the React Native libraries we'll need:
# install following libraries for React Native
npx expo install @react-navigation/native @react-navigation/stack react-native-reanimated react-native-gesture-handler react-native-screens react-native-safe-area-context @react-native-community/masked-view react-native-paper react-native-vector-icons @react-native-async-storage/async-storage firebase
Creating reusable form elements
We'll be creating Login and Signup screens soon which share similar logic. To prevent us from violating the DRY principle, let's create some reusable form components that we can share across these two screens. We'll also create a loading spinner component to provide a good user experience whenever a user waits for a long screen transition.
We'll create reusable FormInput, FormButton, and Loading UI components.
At the root of your Expo React Native app, create a src/ directory and inside it create another new components/ directory.
Inside the src/components/ directory, create a new JavaScript file formInput.js. In this file, we'll
define a React component to provide a text input field
for our Login and Signup screens to use for the user to enter their credentials.
The formInput.js file should contain the following code snippet:
import React from 'react';
import { Dimensions, StyleSheet } from 'react-native';
import { TextInput } from 'react-native-paper';

const { width, height } = Dimensions.get('screen');

export default function FormInput({ labelName, ...rest }) {
  return (
    <TextInput
      label={labelName}
      style={styles.input}
      numberOfLines={1}
      {...rest}
    />
  );
}

const styles = StyleSheet.create({
  input: {
    marginTop: 10,
    marginBottom: 10,
    width: width / 1.5,
    height: height / 15
  }
});
Our next reusable component is going to be in another file formButton.js. We'll use it to display a button
for a user to confirm their credentials.
The formButton.js file should contain:
import React from 'react';
import { Dimensions, StyleSheet } from 'react-native';
import { Button } from 'react-native-paper';

const { width, height } = Dimensions.get('screen');

export default function FormButton({ title, modeValue, ...rest }) {
  return (
    <Button
      mode={modeValue}
      {...rest}
      style={styles.button}
      contentStyle={styles.buttonContainer}
    >
      {title}
    </Button>
  );
}

const styles = StyleSheet.create({
  button: {
    marginTop: 10
  },
  buttonContainer: {
    width: width / 2,
    height: height / 15
  }
});
Finally, create a loading.js file. We'll use it to display a loading spinner when a user has to wait for a
screen transition.
The loading.js file should contain:
import React from 'react';
import { ActivityIndicator, StyleSheet, View } from 'react-native';

export default function Loading() {
  return (
    <View style={styles.loadingContainer}>
      <ActivityIndicator size='large' color='#5b3a70' />
    </View>
  );
}

const styles = StyleSheet.create({
  loadingContainer: {
    flex: 1,
    alignItems: 'center',
    justifyContent: 'center'
  }
});
Now that we have our reusable form components, we can create a login screen for users to enter our chat app.
Creating a login screen
The first screen we'll be creating is the login screen. We will ask an existing user for their email and password to authenticate, and provide a link to a sign-up form for new users to register with our app.
The login screen should look like this after you're done:

Inside the src/, create a screens/ directory; inside this directory create a loginScreen.js file.
The loginScreen.js file should contain:
import React, { useState } from 'react';
import { StyleSheet, View } from 'react-native';
import { Title } from 'react-native-paper';

import FormButton from '../components/formButton.js';
import FormInput from '../components/formInput.js';

export default function LoginScreen({ navigation }) {
  const [email, setEmail] = useState('');
  const [password, setPassword] = useState('');

  return (
    <View style={styles.container}>
      <Title style={styles.titleText}>Welcome!</Title>
      <FormInput
        labelName='Email'
        value={email}
        autoCapitalize='none'
        onChangeText={(userEmail) => setEmail(userEmail)}
      />
      <FormInput
        labelName='Password'
        value={password}
        secureTextEntry={true}
        onChangeText={(userPassword) => setPassword(userPassword)}
      />
      <FormButton
        title='Login'
        modeValue='contained'
        labelStyle={styles.loginButtonLabel}
        onPress={() => {
          // TODO
        }}
      />
      <FormButton
        title='Sign up here'
        modeValue='text'
        uppercase={false}
        labelStyle={styles.navButtonText}
        onPress={() => navigation.navigate('Signup')}
      />
    </View>
  );
}

const styles = StyleSheet.create({
  container: {
    backgroundColor: '#f5f5f5',
    flex: 1,
    justifyContent: 'center',
    alignItems: 'center'
  },
  titleText: {
    fontSize: 24,
    marginBottom: 10
  },
  loginButtonLabel: {
    fontSize: 22
  },
  navButtonText: {
    fontSize: 16
  }
});
Later, you'll hook up this login screen to ChatKitty to log in users into your app. We've also configured
the navigation prop to navigate the user to the signup screen you'll soon be creating. For now,
let's add a stack navigator to direct users to the initial login route.
Create a new directory src/context/. This will contain all the routes and components needed to build
the app's navigation as well as context providers using the React Context API.
Inside this directory, create a authStack.js file that defines a stack navigator for our authentication screens.
The authStack.js file should contain:
import { createStackNavigator } from '@react-navigation/stack';
import React from 'react';

import LoginScreen from '../screens/loginScreen';

const Stack = createStackNavigator();

export default function AuthStack() {
  return (
    <Stack.Navigator initialRouteName='Login' screenOptions={{ headerShown: false }}>
      <Stack.Screen name='Login' component={LoginScreen} />
    </Stack.Navigator>
  );
}
Later, we'll be adding another route for the Signup screen to our navigator.
Next, you'll need a navigation container to hold the app's stacks, starting with the auth stack.
Create a routes.js file inside the src/context/ directory.
The routes.js file should contain:
import { NavigationContainer } from '@react-navigation/native';
import React from 'react';

import AuthStack from './authStack';

export default function Routes() {
  return (
    <NavigationContainer>
      <AuthStack />
    </NavigationContainer>
  );
}
We'll also be wrapping the app's routes in a paper provider that provides a theme for all the app components.
Create an index.js inside src/context/. This file should contain:
import React from 'react';
import { DefaultTheme, Provider as PaperProvider } from 'react-native-paper';

import Routes from './routes';

export default function Providers() {
  return (
    <PaperProvider theme={theme}>
      <Routes />
    </PaperProvider>
  );
}

const theme = {
  ...DefaultTheme,
  roundness: 2,
  colors: {
    ...DefaultTheme.colors,
    primary: '#5b3a70',
    accent: '#50c878',
    background: '#f7f9fb'
  }
};
Next, let's update the App.js file in the project root directory to use our providers.
The App.js file should now contain:
import React from 'react';

import Providers from './src/context';

export default function App() {
  return <Providers />;
}
Now, if you run the app, you should see the login screen:

Creating a sign-up screen
Now that you have a Login screen, you'll need a way for new users to sign up for your chat app, so let's build a Signup screen. We'll ask a new user for their email, a new password, as well as a display name that will be shown to other users in the app.
The sign-up screen should look like this after you're done:

First, inside the src/screens/ directory, create a signupScreen.js file to hold your Signup screen component.
Then, add the following to signupScreen.js:
import React, { useState } from 'react';
import { StyleSheet, View } from 'react-native';
import { IconButton, Title } from 'react-native-paper';

import FormButton from '../components/formButton';
import FormInput from '../components/formInput';

export default function SignupScreen({ navigation }) {
  const [displayName, setDisplayName] = useState('');
  const [email, setEmail] = useState('');
  const [password, setPassword] = useState('');

  return (
    <View style={styles.container}>
      <Title style={styles.titleText}>Let's get started!</Title>
      <FormInput
        labelName='Display Name'
        value={displayName}
        autoCapitalize='none'
        onChangeText={(userDisplayName) => setDisplayName(userDisplayName)}
      />
      <FormInput
        labelName='Email'
        value={email}
        autoCapitalize='none'
        onChangeText={(userEmail) => setEmail(userEmail)}
      />
      <FormInput
        labelName='Password'
        value={password}
        secureTextEntry={true}
        onChangeText={(userPassword) => setPassword(userPassword)}
      />
      <FormButton
        title='Signup'
        modeValue='contained'
        labelStyle={styles.loginButtonLabel}
        onPress={() => {
          // TODO
        }}
      />
      <IconButton
        icon='keyboard-backspace'
        size={30}
        style={styles.navButton}
        iconColor='#5b3a70'
        onPress={() => navigation.goBack()}
      />
    </View>
  );
}

const styles = StyleSheet.create({
  container: {
    backgroundColor: '#f5f5f5',
    flex: 1,
    justifyContent: 'center',
    alignItems: 'center'
  },
  titleText: {
    fontSize: 24,
    marginBottom: 10
  },
  loginButtonLabel: {
    fontSize: 22
  },
  navButtonText: {
    fontSize: 18
  },
  navButton: {
    marginTop: 10
  }
});
Later, we'll hook up this screen to Firebase and ChatKitty to create a new user profile and begin a new chat session. Now, like with the login screen, let's add this screen to the auth stack navigator.
Edit the authStack.js file you created earlier in src/context/, adding the signup screen to its stack screen:
import { createStackNavigator } from '@react-navigation/stack';
import React from 'react';

import LoginScreen from '../screens/loginScreen';
import SignupScreen from '../screens/signupScreen';

const Stack = createStackNavigator();

export default function AuthStack() {
  return (
    <Stack.Navigator initialRouteName='Login' screenOptions={{ headerShown: false }}>
      <Stack.Screen name='Login' component={LoginScreen} />
      <Stack.Screen name='Signup' component={SignupScreen} />
    </Stack.Navigator>
  );
}
Now, if you run the app and tap the "Sign up here" form button text on the login screen, you should see the sign-up screen:

With both the screens we need for user authentication set up, let's create a home screen to redirect users after they authenticate.
Creating a home screen
For now let's define a placeholder home screen to redirect users to after they log in or sign up. In future tutorials, we'll flesh out this screen with complete real-time chat functionality.
Inside the src/screens/ directory, create a homeScreen.js file.
The homeScreen.js file should contain:
import React from 'react';
import { StyleSheet, View } from 'react-native';
import { Title } from 'react-native-paper';

import FormButton from '../components/formButton';

export default function HomeScreen() {
  return (
    <View style={styles.container}>
      <Title>ChatKitty Example</Title>
      <FormButton modeValue='contained' title='Logout' />
    </View>
  );
}

const styles = StyleSheet.create({
  container: {
    backgroundColor: '#f5f5f5',
    flex: 1,
    justifyContent: 'center',
    alignItems: 'center'
  }
});
You'll need another navigation stack to handle screen routes after the user logs in. To do so, create a homeStack.js file inside the src/context directory.
The homeStack.js file should contain:
import { createStackNavigator } from '@react-navigation/stack';
import React from 'react';

import HomeScreen from '../screens/homeScreen';

const Stack = createStackNavigator();

export default function HomeStack() {
  return (
      <Stack.Navigator>
        <Stack.Screen name='Home' component={HomeScreen} />
      </Stack.Navigator>
  );
}
You will also need a context provider that is responsible for authentication. Inside the src/context directory create a authProvider.js file.
The authProvider.js file should contain the following:
import React, { createContext, useState } from 'react';

export const AuthContext = createContext({});

export const AuthProvider = ({ children }) => {
  const [user, setUser] = useState(null);
  const [loading, setLoading] = useState(false);

  return (
    <AuthContext.Provider
      value={{
        user,
        setUser,
        loading,
        setLoading,
        login: async (email, password) => {
          // TODO
        },
        register: async (displayName, email, password) => {
          // TODO
        },
        logout: async () => {
          // TODO
        }
      }}
    >
      {children}
    </AuthContext.Provider>
  );
};
Later, we'll be updating the authentication provider to log in, register, and logout the user using Firebase and ChatKitty.
To get the authentication context inside your app components, you'll need to wrap the app routes with the authentication provider.
Edit the src/context/index.js file to wrap the app routes with the authentication provider.
The index.js file should now contain:
import React from 'react';
import { DefaultTheme, Provider as PaperProvider } from 'react-native-paper';

import { AuthProvider } from './authProvider';
import Routes from './routes';

export default function Providers() {
  return (
    <PaperProvider theme={theme}>
      <AuthProvider>
        <Routes />
      </AuthProvider>
    </PaperProvider>
  );
}

const theme = {
  ...DefaultTheme,
  roundness: 2,
  colors: {
    ...DefaultTheme.colors,
    primary: '#5b3a70',
    accent: '#50c878',
    background: '#f7f9fb'
  }
};
Now, we have screens for user authentication, and a place to redirect users after they authenticate. Next, let's hook the app up to a Firebase and ChatKitty backend.
Creating a Firebase project
You'll be using Firebase to manage user passwords and authentication, so you'll need a Firebase project. If you don't already have one, create a new project using the Firebase console.
From the Firebase console home, create a project:
Then, fill out the details of your Firebase project:
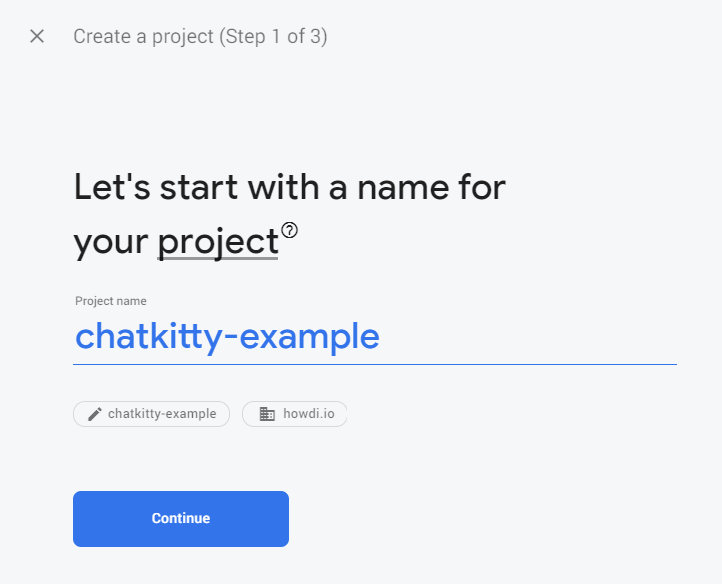
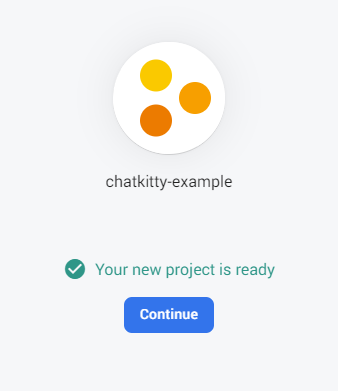
When you're done, click the "Continue" button, you'll be redirected to a dashboard screen for your new Firebase project.
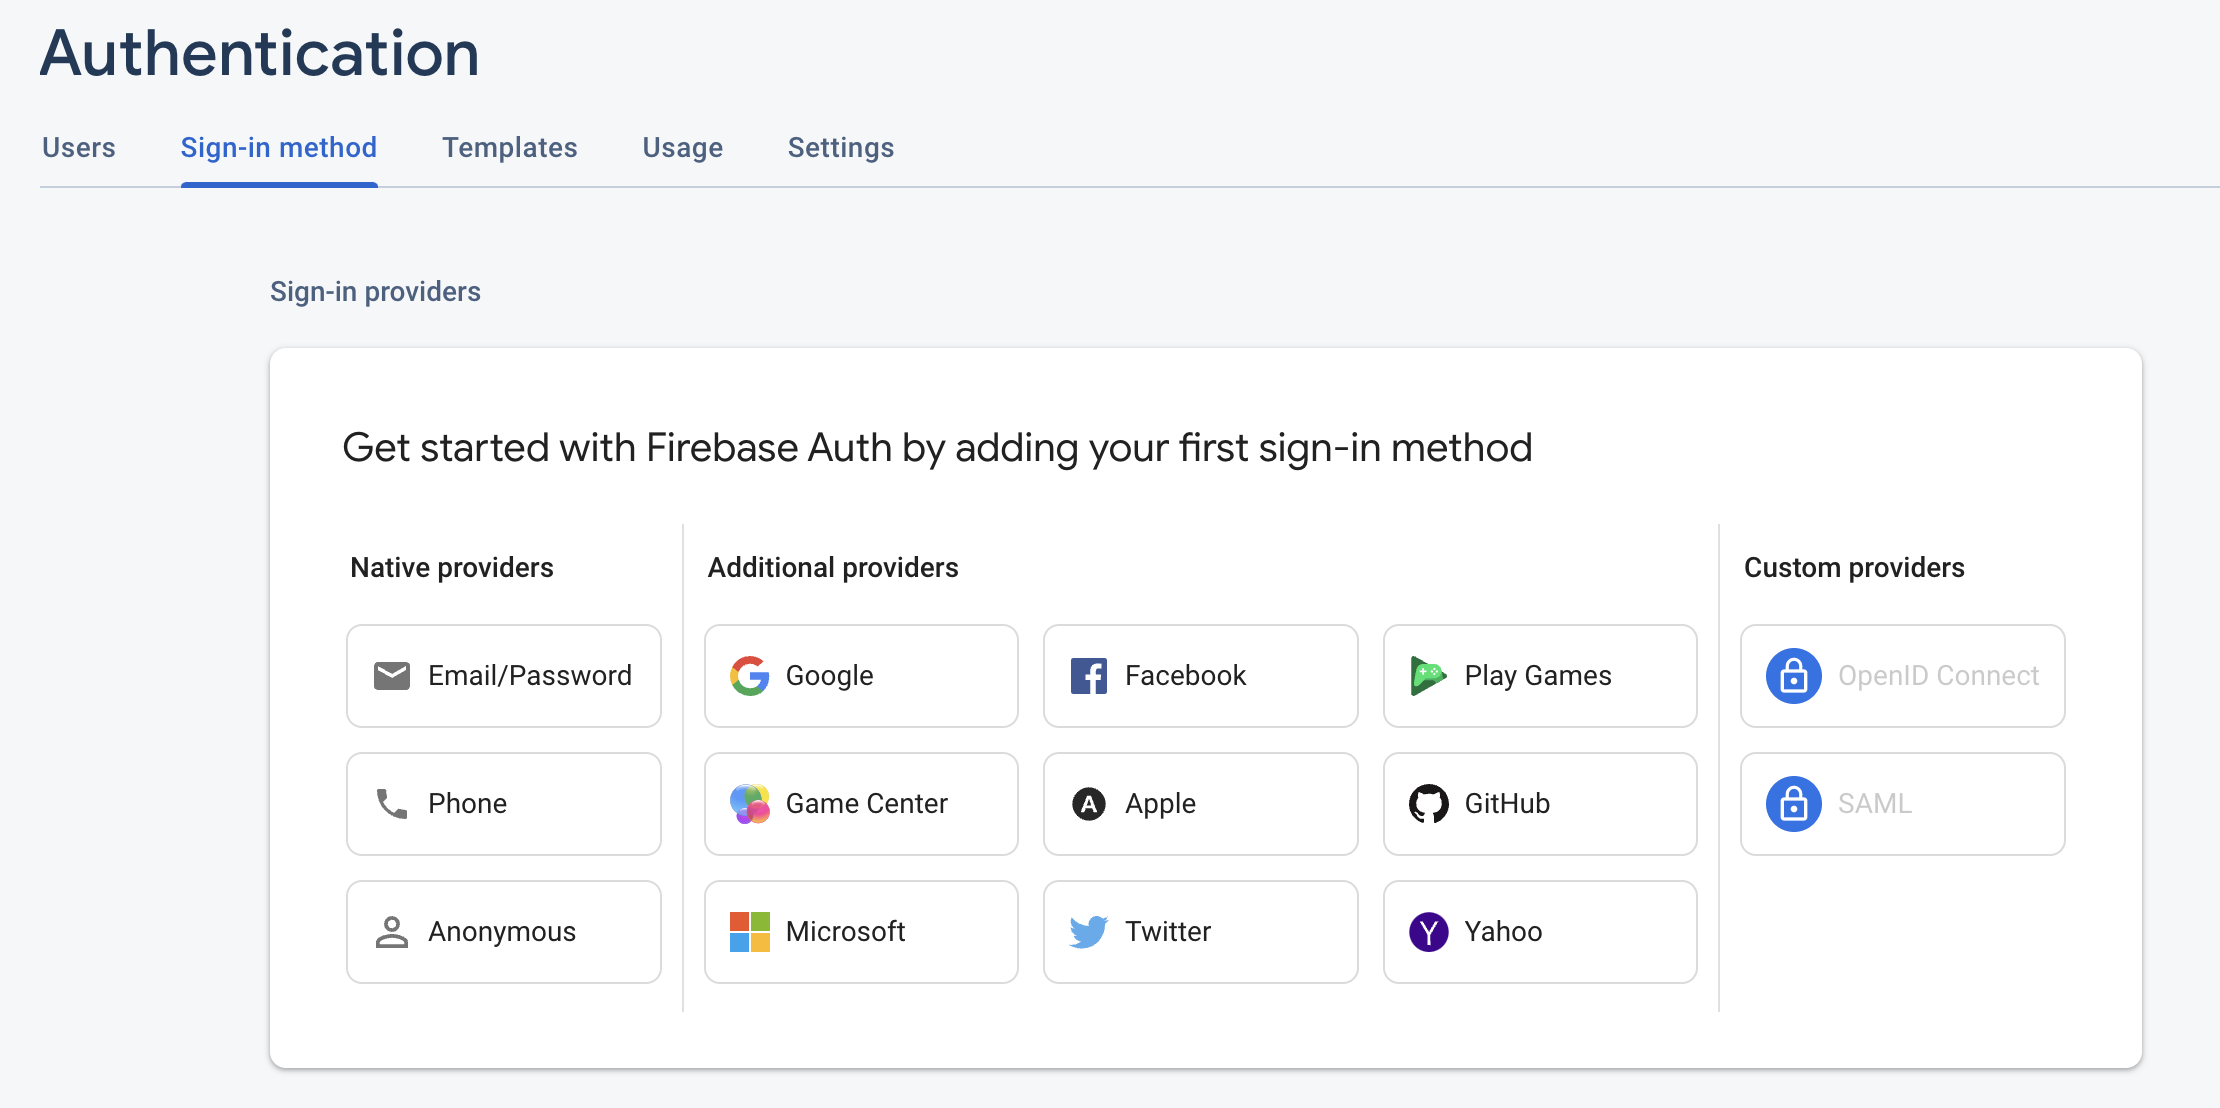
To support user email and password login, you'll need to enable the Firebase email sign-in method. From the Firebase console side menu, navigate to the Authentication section.
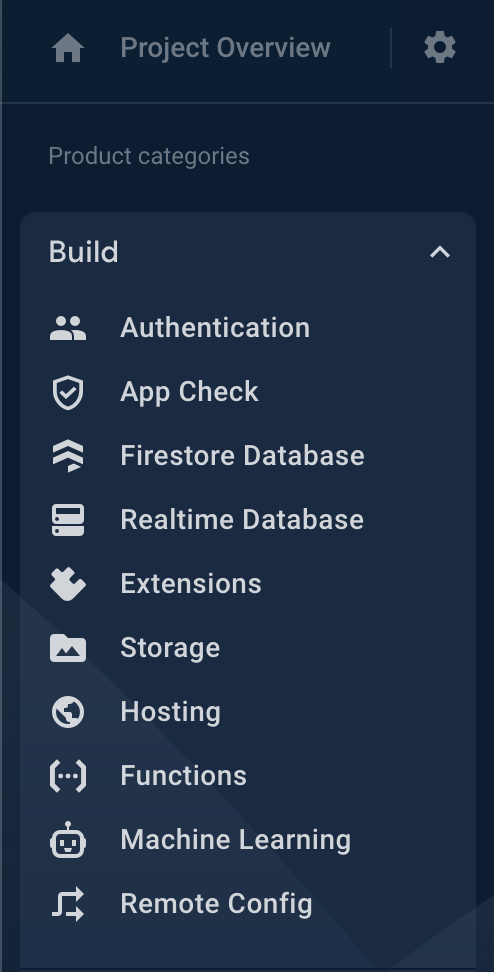
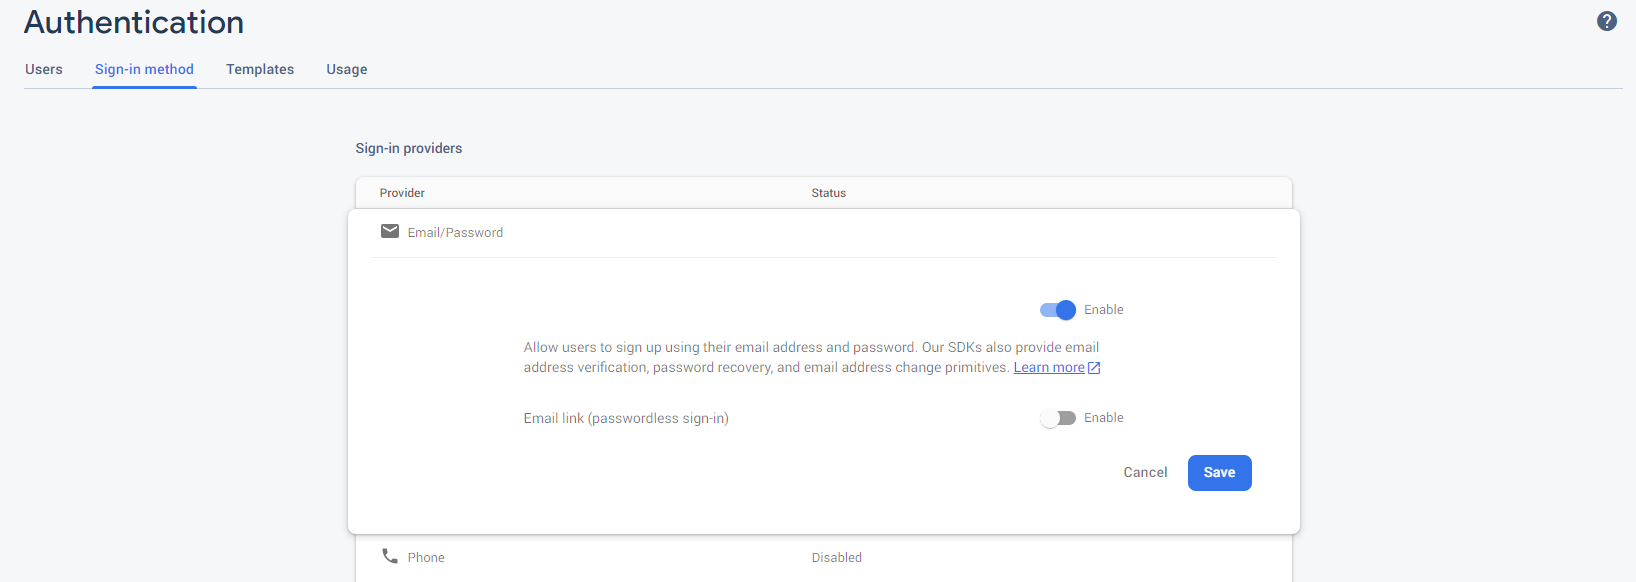
Next, go to the "Sign-in method" tab, and enable the email sign-in provider.
Adding Firebase credentials to the app
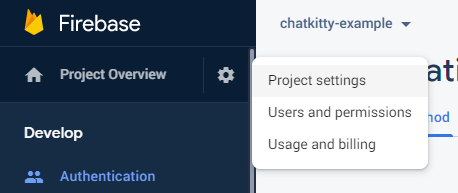
To add Firebase credentials to your app, go to your "Project settings" from the Firebase console menu.
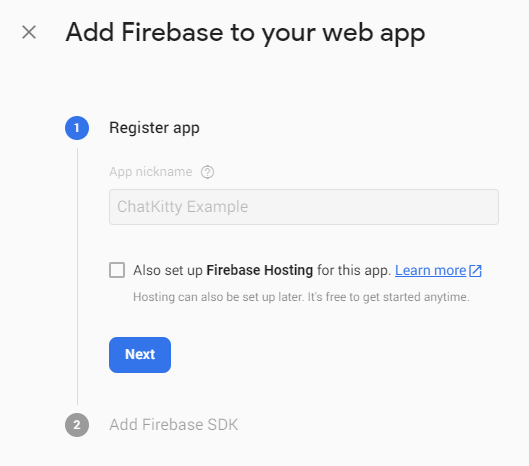
Then, go to the "Your apps" section and click the Web icon

Fill out the application details
Continue to the console settings page
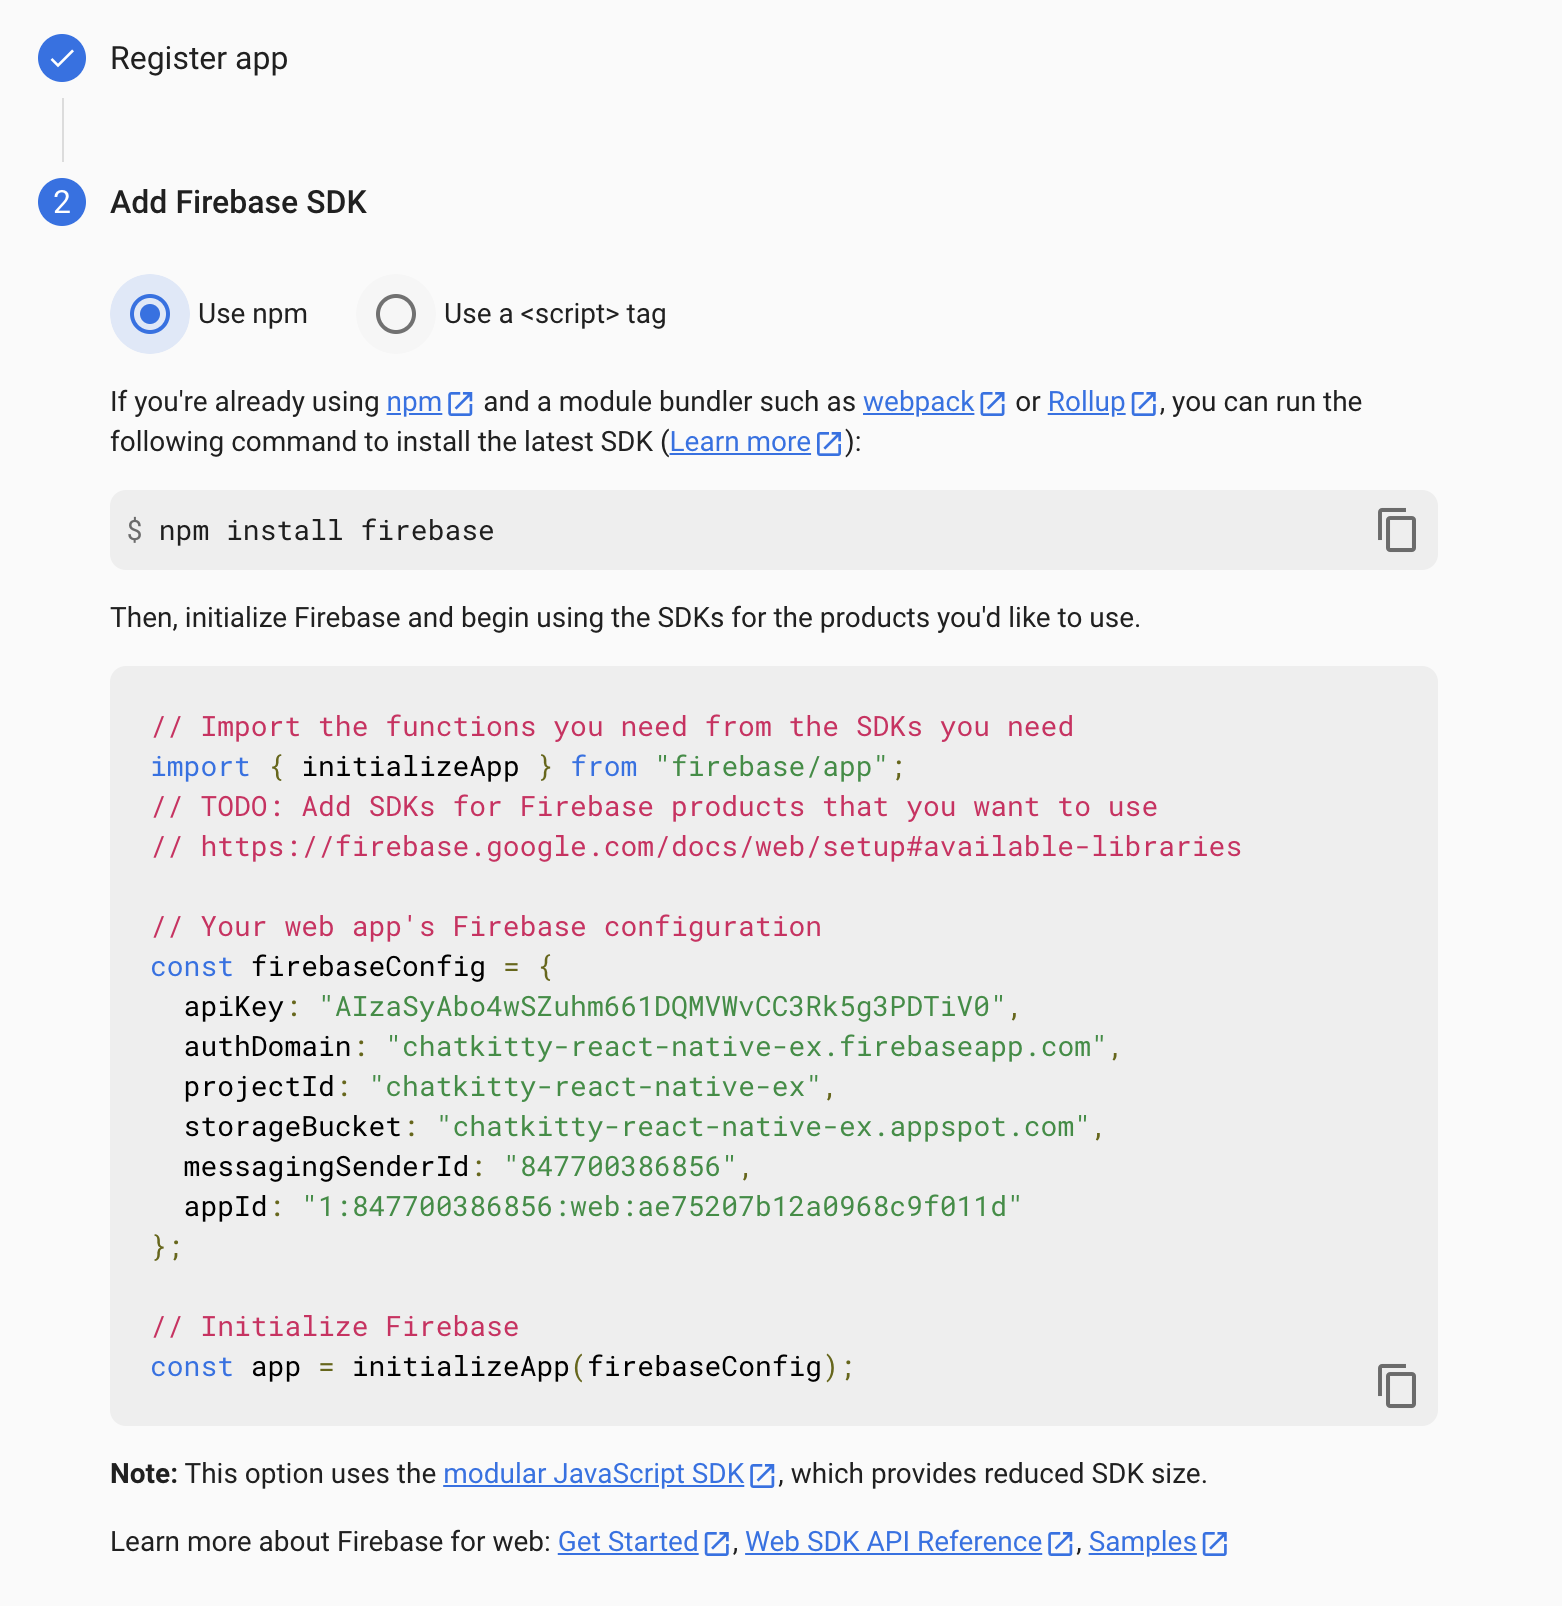
You should now be able to copy your Firebase web app config to add to your Expo React Native project.
From the "Your apps" section, select the "FirebaseConfig" Firebase SDK snippet for your web app and copy it:
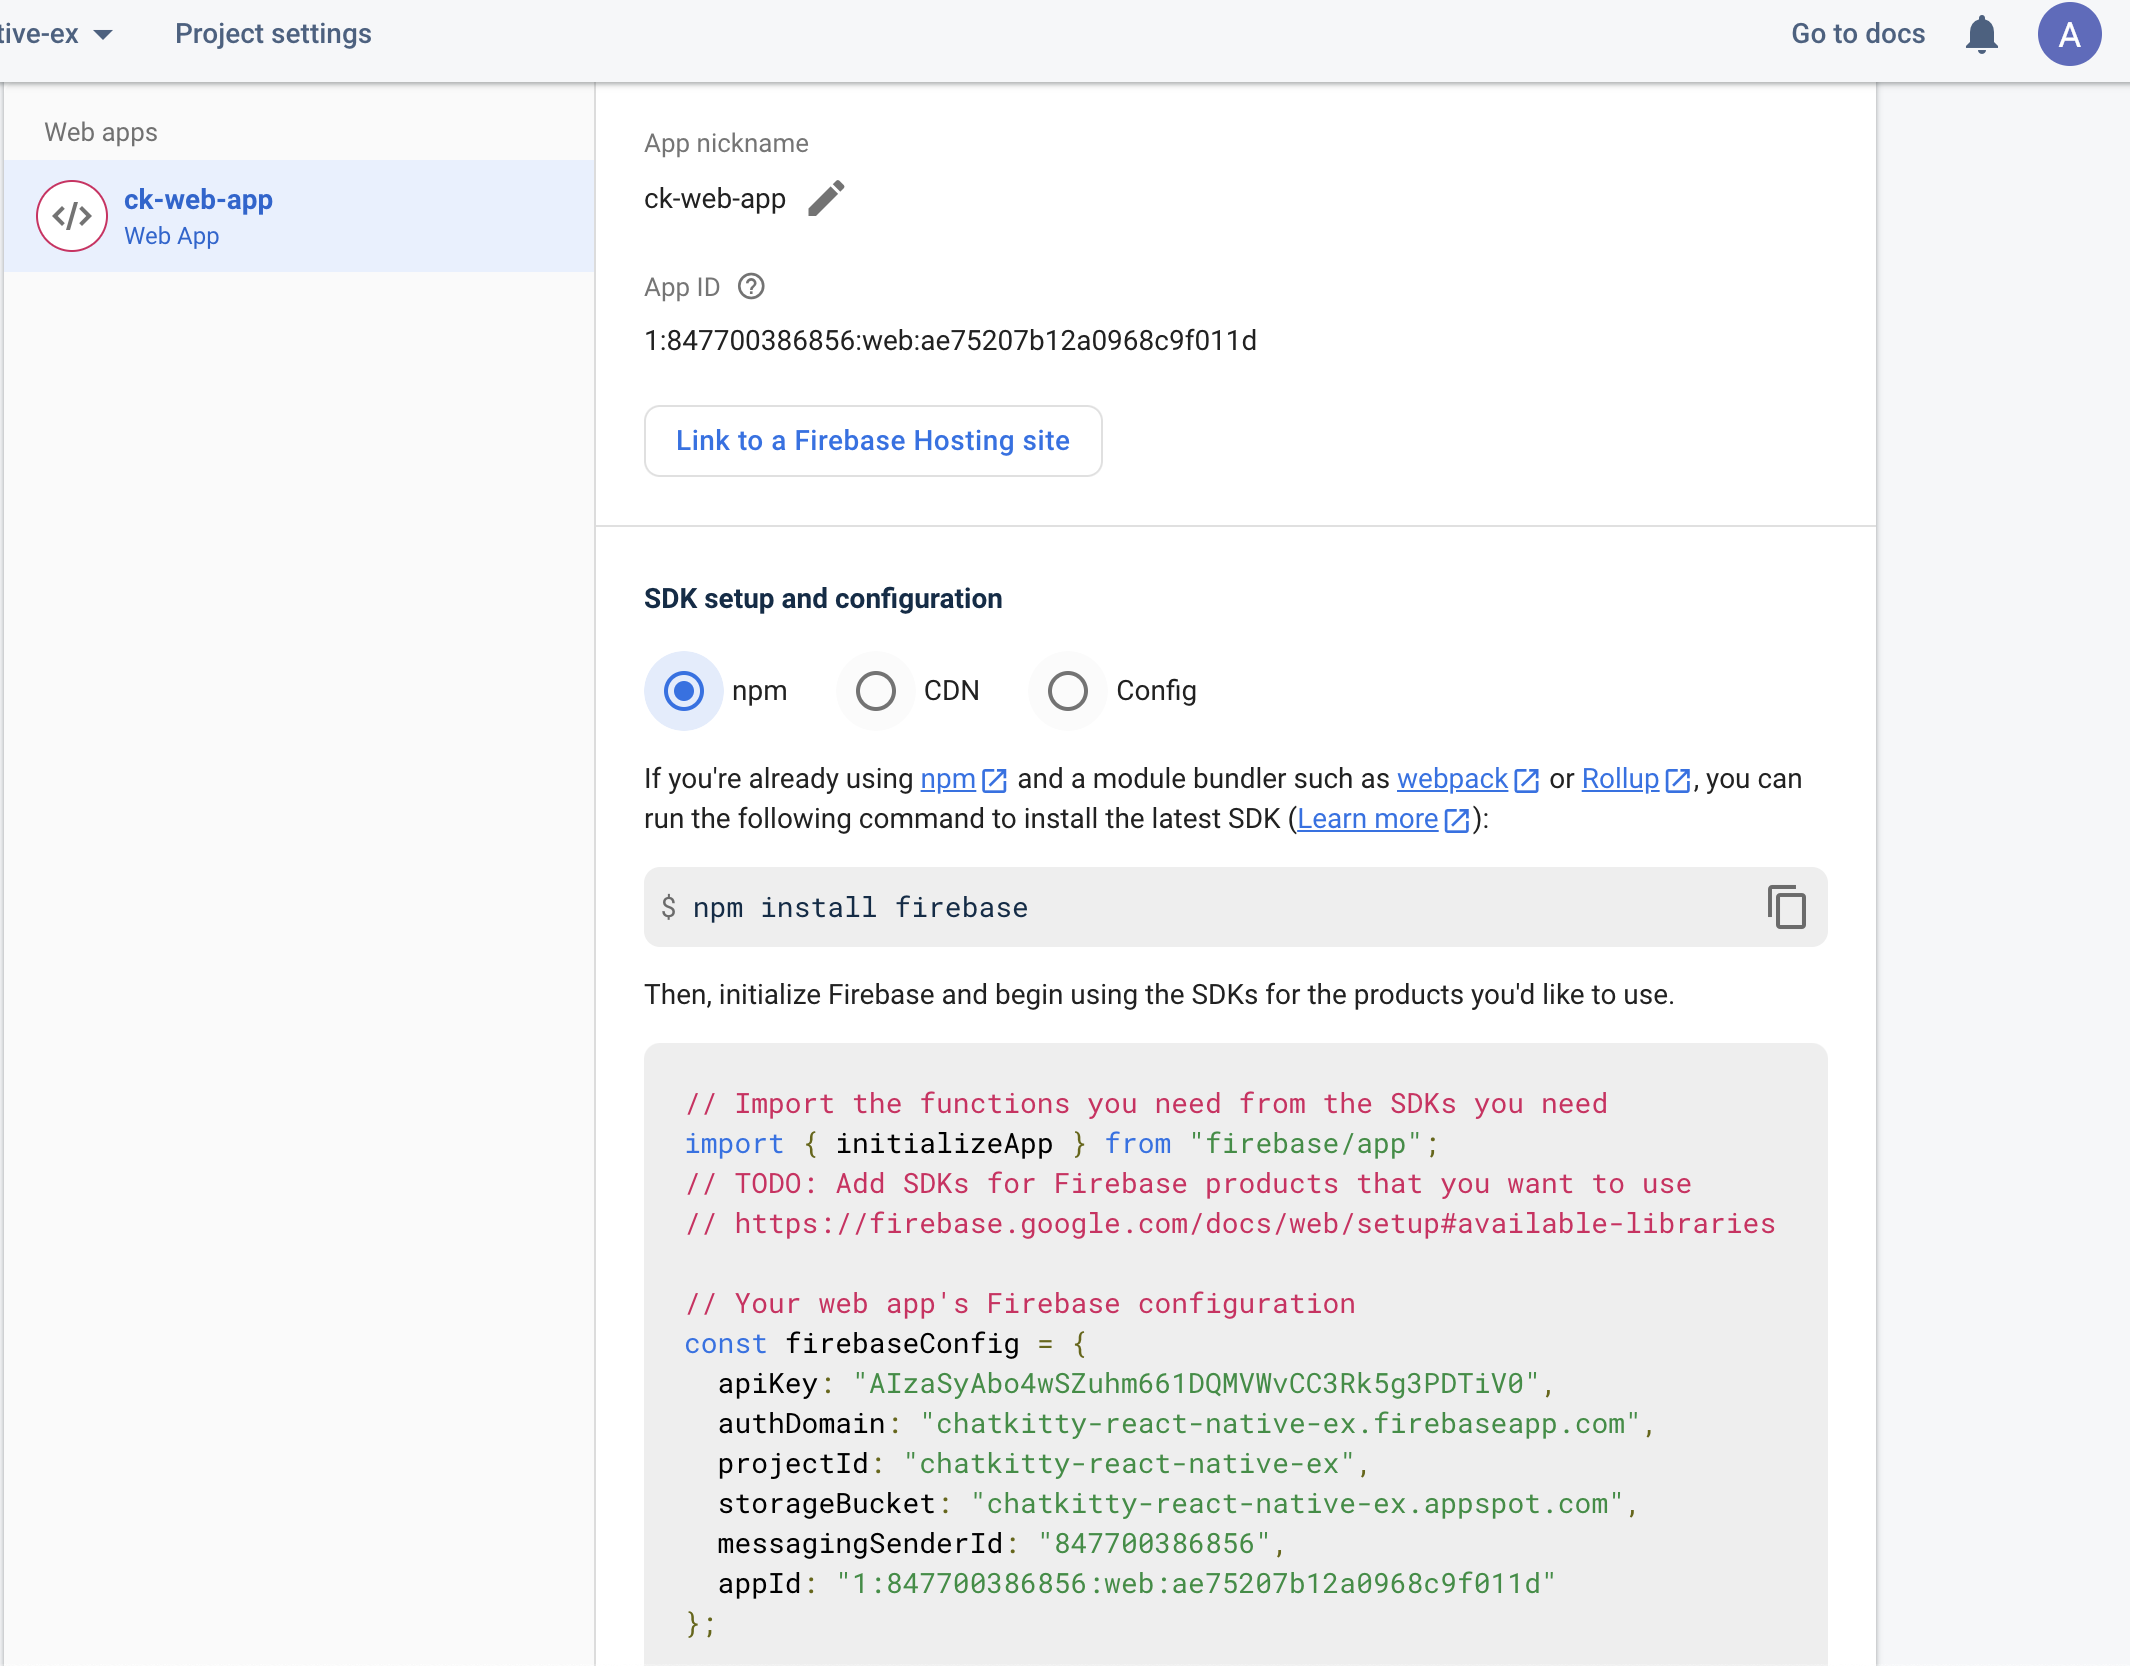
Next, in your Expo React Native project, inside the src/ directory, create a firebase/ directory.
Inside the src/firebase directory, create an index.js file to hold your Firebase web app credentials.
The index.js file should contain:
import AsyncStorage from '@react-native-async-storage/async-storage';
import { initializeApp } from 'firebase/app';
import {
  initializeAuth,
  getReactNativePersistence
} from 'firebase/auth/react-native';

// Replace this with your Firebase SDK config snippet
const firebaseConfig = {
  /* YOUR FIREBASE CONFIG OBJECT PROPERTIES HERE */
};

// Initialize Firebase
const app = initializeApp(firebaseConfig);

// Initialize Auth
const auth = initializeAuth(app, {
  persistence: getReactNativePersistence(AsyncStorage)
});

export { auth };
Replacing firebaseConfig with the value from your Firebase SDK config snippet.
That's it! You've now configured your Expo React Native app to use Firebase.
Hooking up user registration to Signup screen
You now have everything
needed to create new users in Firebase. Let's partially implement the register function stub in
the authentication provider to add new users to Firebase.
To do so, you'll edit the src/context/authProvider.js file to use Firebase to register new users.
The authProvider.js file should now contain:
import React, { createContext, useState } from 'react';

import { createUserWithEmailAndPassword, updateProfile } from 'firebase/auth/react-native';
import { auth } from '../firebase';

export const AuthContext = createContext({});

export const AuthProvider = ({ children }) => {
  const [user, setUser] = useState(null);
  const [loading, setLoading] = useState(false);

  return (
    <AuthContext.Provider
      value={{
        user,
        setUser,
        loading,
        setLoading,
        login: async (email, password) => {
          // TODO
        },
        register: async (displayName, email, password) => {
          setLoading(true);

          try {
            const userCredential = await createUserWithEmailAndPassword(
              auth, email, password);

            await updateProfile(auth.currentUser, {
              displayName: displayName
            });

            // Signed-in Firebase user
            const currentUser = userCredential.user;

            console.log("Firebase user created: ", currentUser);
          } catch (error) {
            console.error(error);
          } finally {
            setLoading(false);
          }
        },
        logout: async () => {
          // TODO
        }
      }}
    >
      {children}
    </AuthContext.Provider>
  );
};
Now, we can hook the register function to the Signup screen.
Edit the src/screens/signupScreen.js file to call the register function.
The signupScreen.js file should now contain:
import React, { useContext, useState } from 'react';
import { StyleSheet, View } from 'react-native';
import { IconButton, Title } from 'react-native-paper';

import FormButton from '../components/formButton';
import FormInput from '../components/formInput';
import Loading from '../components/loading';
import { AuthContext } from '../context/authProvider';

export default function SignupScreen({ navigation }) {
  const [displayName, setDisplayName] = useState('');
  const [email, setEmail] = useState('');
  const [password, setPassword] = useState('');

  const { register, loading } = useContext(AuthContext);

  if (loading) {
    return <Loading />;
  }

  return (
    <View style={styles.container}>
      <Title style={styles.titleText}>Let's get started!</Title>
      <FormInput
        labelName='Display Name'
        value={displayName}
        autoCapitalize='none'
        onChangeText={(userDisplayName) => setDisplayName(userDisplayName)}
      />
      <FormInput
        labelName='Email'
        value={email}
        autoCapitalize='none'
        onChangeText={(userEmail) => setEmail(userEmail)}
      />
      <FormInput
        labelName='Password'
        value={password}
        secureTextEntry={true}
        onChangeText={(userPassword) => setPassword(userPassword)}
      />
      <FormButton
        title='Signup'
        modeValue='contained'
        labelStyle={styles.loginButtonLabel}
        onPress={() => register(displayName, email, password)}
      />
      <IconButton
        icon='keyboard-backspace'
        size={30}
        style={styles.navButton}
        iconColor='#5b3a70'
        onPress={() => navigation.goBack()}
      />
    </View>
  );
}

const styles = StyleSheet.create({
  container: {
    backgroundColor: '#f5f5f5',
    flex: 1,
    justifyContent: 'center',
    alignItems: 'center'
  },
  titleText: {
    fontSize: 24,
    marginBottom: 10
  },
  loginButtonLabel: {
    fontSize: 22
  },
  navButtonText: {
    fontSize: 18
  },
  navButton: {
    marginTop: 10
  }
});
Run the app now and submit a sign-up form:
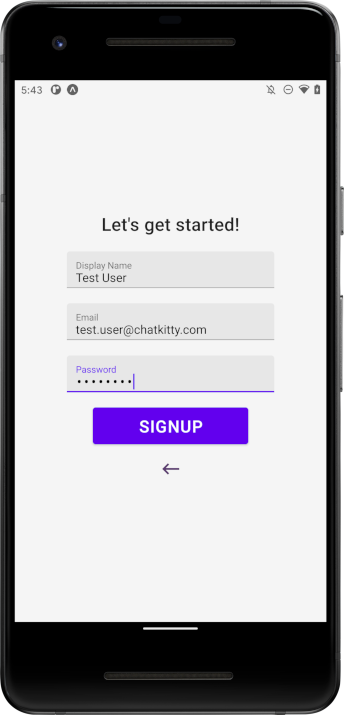
A new Firebase user should be created. You can verify this by checking the Firebase dashboard, Under the "Authentication" "Users" section, you should see your user:

To complete the sign-up and login process, you'll need a ChatKitty project to connect to the ChatKitty JavaScript SDK and create chat sessions for your users. Let's create a ChatKitty project now.
Creating a ChatKitty project
You'll be using ChatKitty to provide real-time chat functionality for your chat app. You can create a free ChatKitty account here.
Once you've created a ChatKitty account, create an application for your Expo React Native project:
Adding Firebase to your Chat Runtime
Now, let's integrate Firebase into your ChatKitty project. ChatKitty makes it easy to integrate any back-end into a ChatKitty application using Chat Functions. Chat Functions let you write arbitrary code that runs any time a relevant event or action happens inside your app. You can send push notifications, create emails, or make HTTP calls to your backend, as well as use a pre-initialized server-side ChatKitty SDK to make changes to your application in response to user actions. With ChatKitty, you can use any NPM package inside your Chat Functions as a Chat Runtime dependency.
Let's now add Firebase as a Chat Runtime dependency. From your ChatKitty application dashboard, go to the "Functions" page:
Go to the "Runtime" tab and add a new dependency to the Firebase JavaScript SDK
NPM package, firebase-admin. Version 11.4.1 was the latest version as of the time this article was written.
 Remember to click the "Save" icon to confirm your chat runtime dependencies changes.
Before you can use Firebase within your chat functions, the Firebase SDK needs to be initialized. You can add arbitrary code that runs before each chat function using a chat runtime initialization script. Let's add an initialization script to initialize the Firebase SDK.
From the "Runtime" tab, click the drop down and select "Initialization Script". You import any NPM module
using the CommonJS require function. To import the Firebase Admin NPM module and initialize Firebase, you'll use a Firebase Service Account Key for your project.
To retrieve a Service Account Key, go to your Firebase project, and then go to the "Service Account" tab. From here, you can click on "Generate Private Key" to retrieve the serviceAccount object.
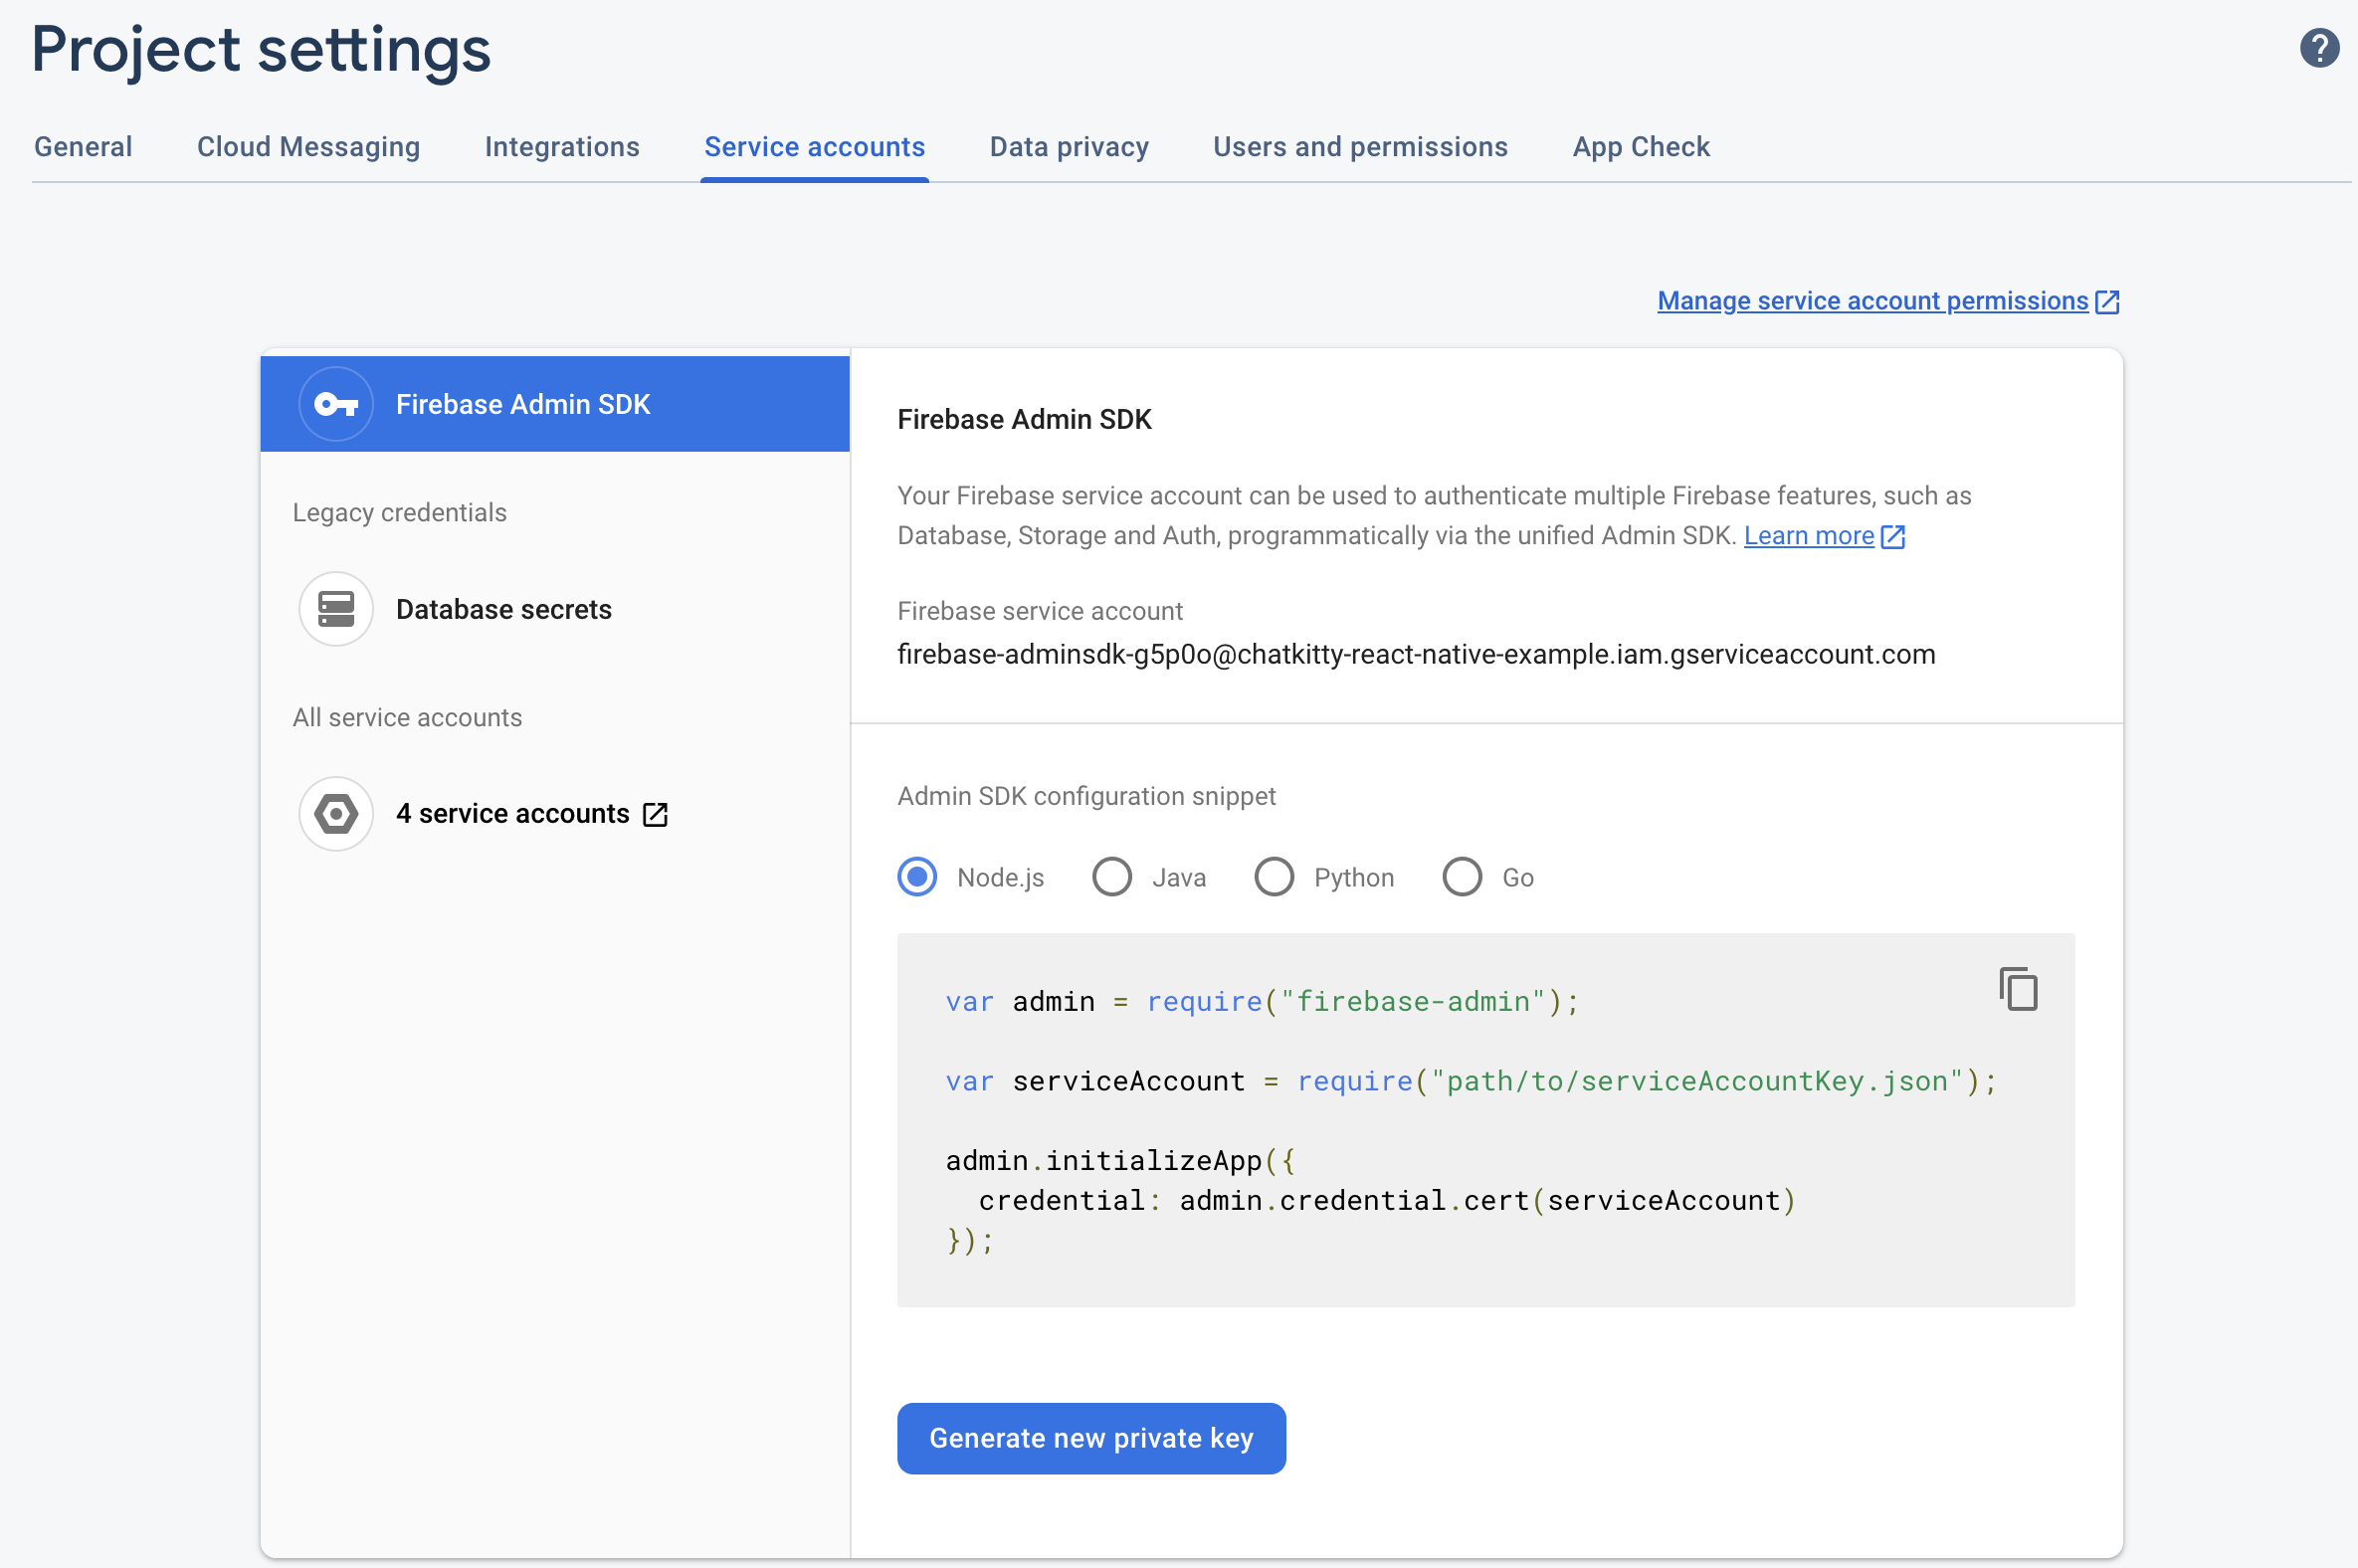
Now, go back to the ChatKitty dashboard and add the following into the Initialization Script:
const admin = require('firebase-admin');

const serviceAccount = {
  // ADD YOUR SERVICE ACCOUNT KEY HERE
};

admin.initializeApp({
  credential: admin.credential.cert(serviceAccount)
});
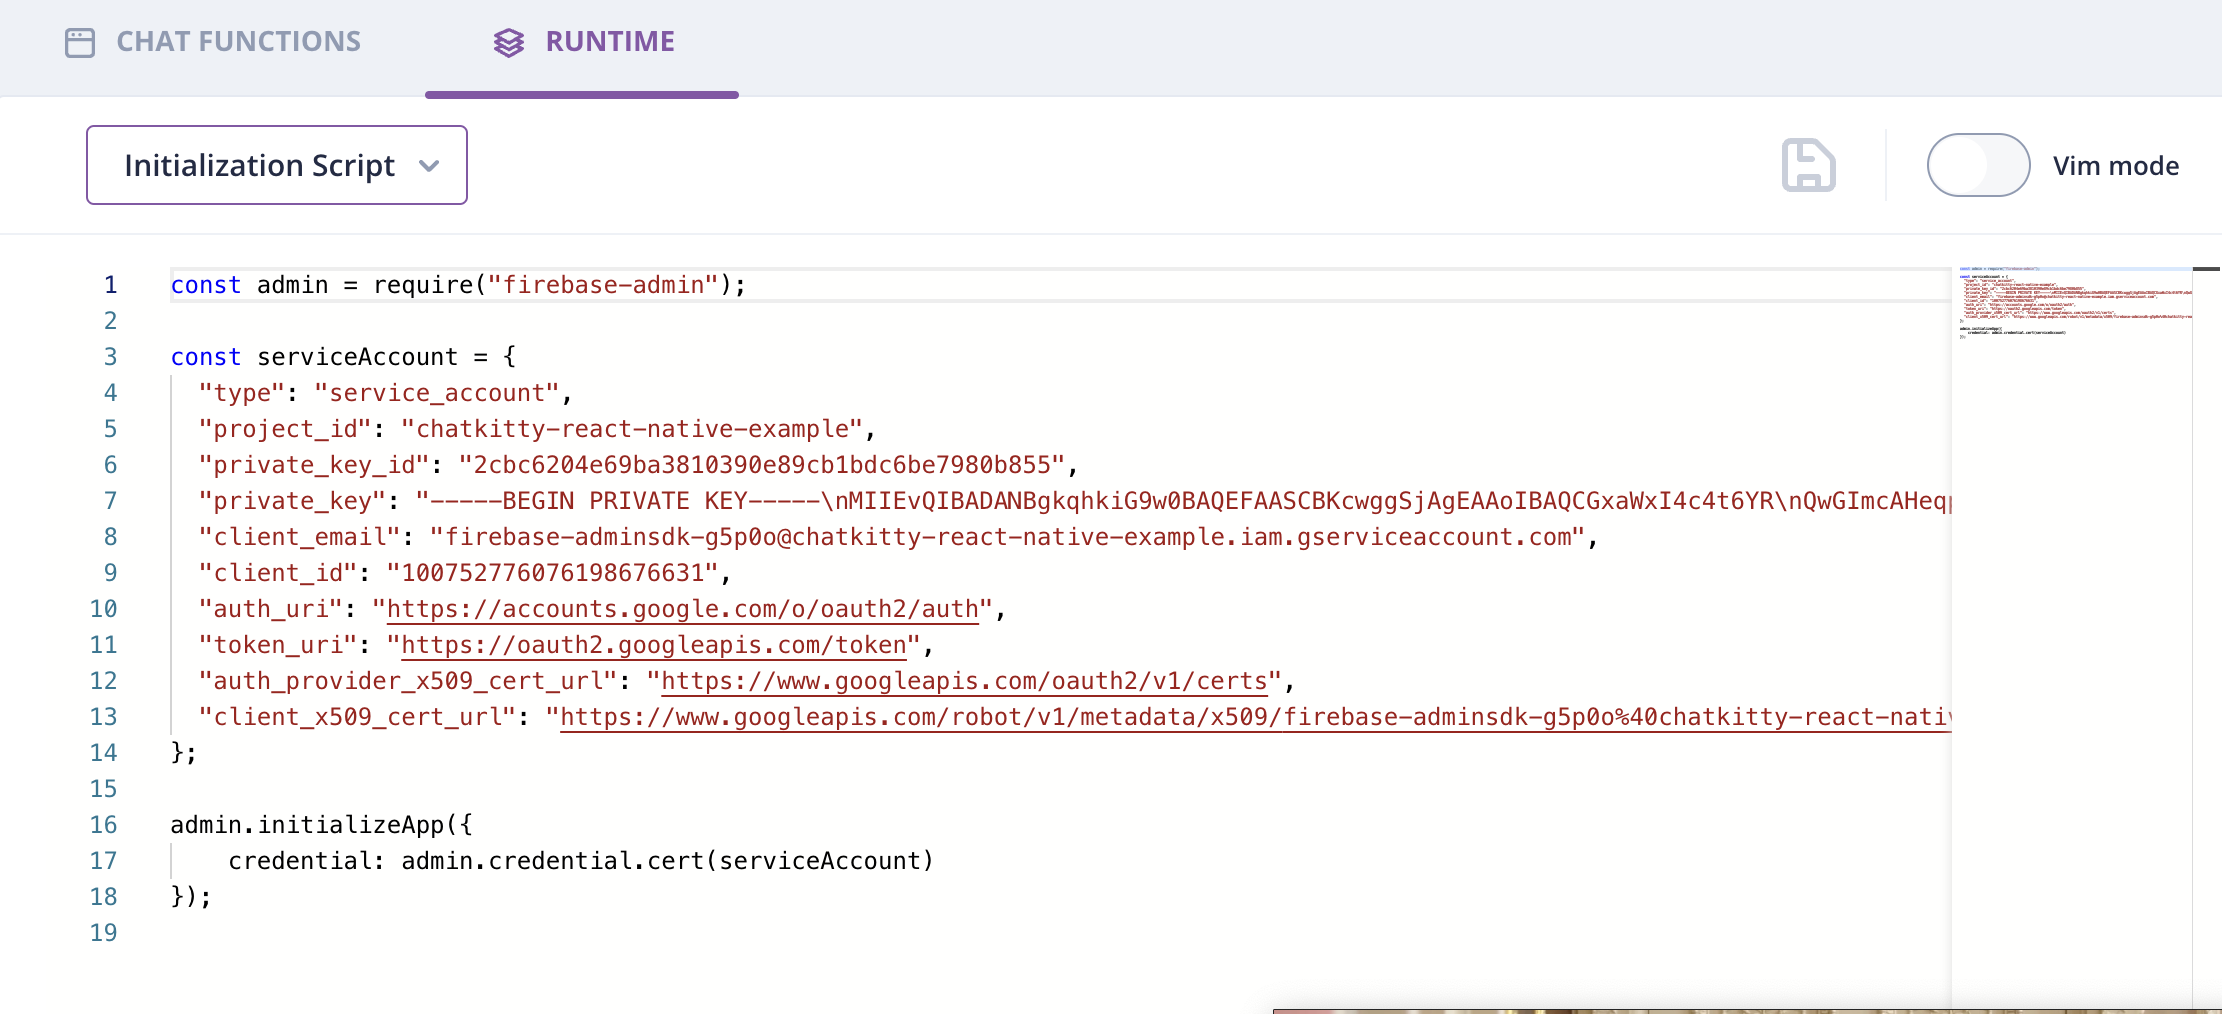 Replacing
 serviceAccount with the value from your Firebase Service Account Key snippet.
Also, remember to click the "Save" icon to confirm your changes.
Now we're ready to define a chat function to check if a user's email and password exist and match what we expect from Firebase, whenever a user tries to begin a new chat session.
Checking user credentials using a chat function
Before we let users begin a chat session and access sensitive data like messages, we need to be sure their credentials match what's stored in Firebase using a chat function.
From your ChatKitty application dashboard, go to the "Functions" page, and select "User Attempted Start Session" event chat function:

This chat function runs whenever a user attempts to start a chat session. Edit the chat function to delegate user authentication to Firebase.
const firebase = require('firebase-admin');

async function handleEvent(event: UserAttemptedStartSessionEvent, context: Context) {
  const username = event.username;

  const idToken = event.authParams.idToken;

  const { uid, name } = await firebase.auth().verifyIdToken(idToken);

  if (username !== uid) {
    throw new Error('This token was not issued for this user');
  }

  const userApi = context.ChatKitty.Users;

  await userApi.checkUserExists(username).catch(async () => {
    await userApi.createUser({
      name: username,
      displayName: name || 'anon',
      isGuest: false
    });
  });
}
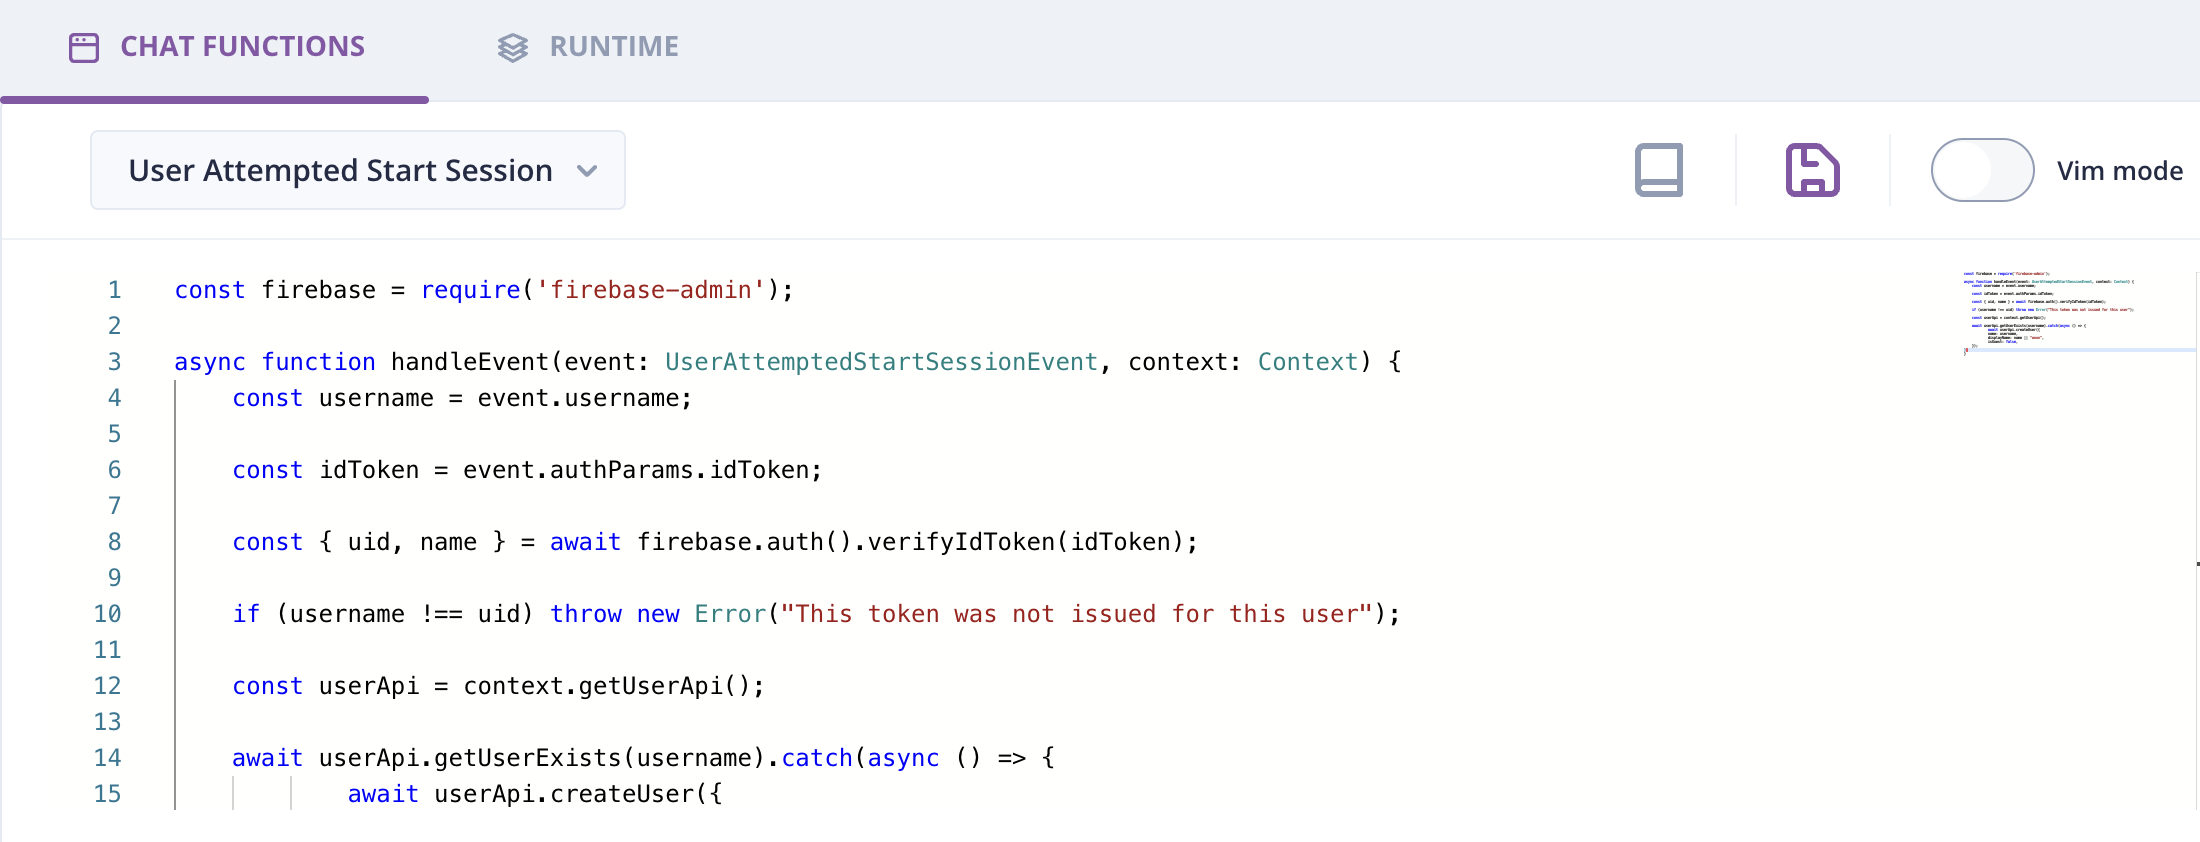 Remember to click the "Save" icon to confirm your chat function changes.
Now, whenever a user tries to log in, ChatKitty checks if a user with their login credentials exists from your Firebase backend, and if so, begins a chat session. With that, we're ready to connect your Expo React Native app to the ChatKitty JavaScript Chat SDK.
Connecting to ChatKitty JS SDK
To use the ChatKitty JavaScript Chat SDK, you'll need to add the ChatKitty JavaScript SDK NPM package to your Expo React Native project:
npx expo install @chatkitty/core
Next, you'll need to configure the ChatKitty SDK with your ChatKitty API key. You can find your API key through the ChatKitty dashboard, inside the "Settings" page.
Copy the string value, under "API Key", you'll need it to initialize a ChatKitty client instance:
Now, in your Expo React Native project, inside the src/ directory, create a chatkitty/ directory.
Inside this src/chatkitty/ directory, create an index.js file to hold your ChatKitty client instance.
The index.js file should contain:
import ChatKitty from '@chatkitty/core';

export const chatkitty = ChatKitty.getInstance('YOUR CHATKITTY API KEY');
With your API key from the ChatKitty dashboard
Let's now complete the chat login flow with the initialized ChatKitty client instance.
Completing user login and sign up with ChatKitty
You now have everything needed to implement a complete and secure chat app signup and login. Let's fill out the missing pieces left in our authentication provider.
Edit the src/context/authProvider.js file to use ChatKitty to login users and create chat sessions.
The authProvider.js file should now contain:
import React, { createContext, useState } from 'react';
import {
  createUserWithEmailAndPassword,
  updateProfile,
  signInWithEmailAndPassword
} from 'firebase/auth/react-native';
import { auth } from '../firebase';
import { chatkitty } from '../chatkitty';

export const AuthContext = createContext({});

export const AuthProvider = ({ children }) => {
  const [user, setUser] = useState(null);
  const [loading, setLoading] = useState(false);

  return (
    <AuthContext.Provider
      value={{
        user,
        setUser,
        loading,
        setLoading,
        login: async (email, password) => {
          setLoading(true);

          try {
            const userCredential = await signInWithEmailAndPassword(auth,
              email, password);

            // Signed-in Firebase user
            const currentUser = userCredential.user;

            const result = await chatkitty.startSession({
              username: currentUser.uid,
              authParams: {
                idToken: await currentUser.getIdToken()
              }
            });

            if (result.failed) {
              console.log('could not login');
            }
          } catch (error) {
            console.error(error);
          } finally {
            setLoading(false);
          }
        },

        register: async (displayName, email, password) => {
          setLoading(true);

          try {
            const userCredential = await createUserWithEmailAndPassword(
              auth, email, password);

            await updateProfile(auth.currentUser, {
              displayName: displayName
            });

            // Signed-in Firebase user
            const currentUser = userCredential.user;

            const startSessionResult = await chatkitty.startSession({
              username: currentUser.uid,
              authParams: {
                idToken: await currentUser.getIdToken()
              }
            });

            if (startSessionResult.failed) {
              console.log('Could not sign up');
            }
          } catch (error) {
            console.error(error);
          } finally {
            setLoading(false);
          }
        },
        logout: async () => {
          try {
            await chatkitty.endSession();
          } catch (error) {
            console.error(error);
          }
        }
      }}
    >
      {children}
    </AuthContext.Provider>
  );
};
Now, we can check if a user is logged in, and if so, route them to the home screen.
Edit the src/context/routes.js file to change the current navigation stack depending on if a user
is logged in or not.
The routes.js file should now contain:
import { NavigationContainer } from '@react-navigation/native';
import React, { useContext, useState, useEffect } from 'react';

import { chatkitty } from '../chatkitty';
import Loading from '../components/loading';

import AuthStack from './authStack';
import HomeStack from './homeStack';
import { AuthContext } from './authProvider';

export default function Routes() {
  const { user, setUser } = useContext(AuthContext);
  const [loading, setLoading] = useState(true);
  const [initializing, setInitializing] = useState(true);

  useEffect(() => {
    return chatkitty.onCurrentUserChanged((currentUser) => {
      setUser(currentUser);

      if (initializing) {
        setInitializing(false);
      }

      setLoading(false);
    });
  }, [initializing, setUser]);

  if (loading) {
    return <Loading />;
  }

  return (
    <NavigationContainer>
      {user ? <HomeStack /> : <AuthStack />}
    </NavigationContainer>
  );
}
Now, let's hook the login function to the Login screen.
To do so, edit the src/screens/loginScreen.js file to call the login function.
The loginScreen.js file should now contain:
import React, { useContext, useState } from 'react';
import { StyleSheet, View } from 'react-native';
import { Title } from 'react-native-paper';

import FormButton from '../components/formButton.js';
import FormInput from '../components/formInput.js';
import Loading from '../components/loading.js';
import { AuthContext } from '../context/authProvider.js';

export default function LoginScreen({ navigation }) {
  const [email, setEmail] = useState('');
  const [password, setPassword] = useState('');

  const { login, loading } = useContext(AuthContext);

  if (loading) {
    return <Loading />;
  }

  return (
    <View style={styles.container}>
      <Title style={styles.titleText}>Welcome!</Title>
      <FormInput
        labelName='Email'
        value={email}
        autoCapitalize='none'
        onChangeText={(userEmail) => setEmail(userEmail)}
      />
      <FormInput
        labelName='Password'
        value={password}
        secureTextEntry={true}
        onChangeText={(userPassword) => setPassword(userPassword)}
      />
      <FormButton
        title='Login'
        modeValue='contained'
        labelStyle={styles.loginButtonLabel}
        onPress={() => {
          login(email, password);
        }}
      />
      <FormButton
        title='Sign up here'
        modeValue='text'
        uppercase={false}
        labelStyle={styles.navButtonText}
        onPress={() => navigation.navigate('Signup')}
      />
    </View>
  );
}

const styles = StyleSheet.create({
  container: {
    backgroundColor: '#f5f5f5',
    flex: 1,
    justifyContent: 'center',
    alignItems: 'center'
  },
  titleText: {
    fontSize: 24,
    marginBottom: 10
  },
  loginButtonLabel: {
    fontSize: 22
  },
  navButtonText: {
    fontSize: 16
  }
});
Finally, let's hook the logout authentication function to the Home screen and show the user's display name.
Edit the src/screens/homeScreen.js file to call the logout function and greet your user.
The homeScreen.js file should now contain:
import React, { useContext } from 'react';
import { StyleSheet, View } from 'react-native';
import { Title } from 'react-native-paper';

import FormButton from '../components/formButton';
import { AuthContext } from '../context/authProvider';

export default function HomeScreen() {
  const { logout } = useContext(AuthContext);

  return (
    <View style={styles.container}>
      <Title>ChatKitty Example</Title>
      <FormButton
        modeValue='contained'
        title='Logout'
        onPress={() => logout()}
      />
    </View>
  );
}

const styles = StyleSheet.create({
  container: {
    backgroundColor: '#f5f5f5',
    flex: 1,
    justifyContent: 'center',
    alignItems: 'center'
  }
});
If you run the application now and try to login with the test user credentials you created earlier
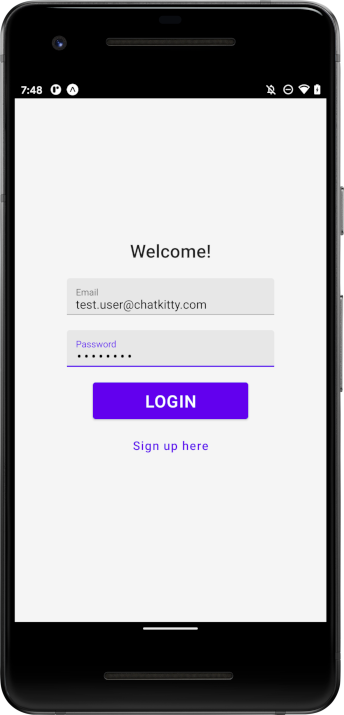
You should be redirected to your home screen
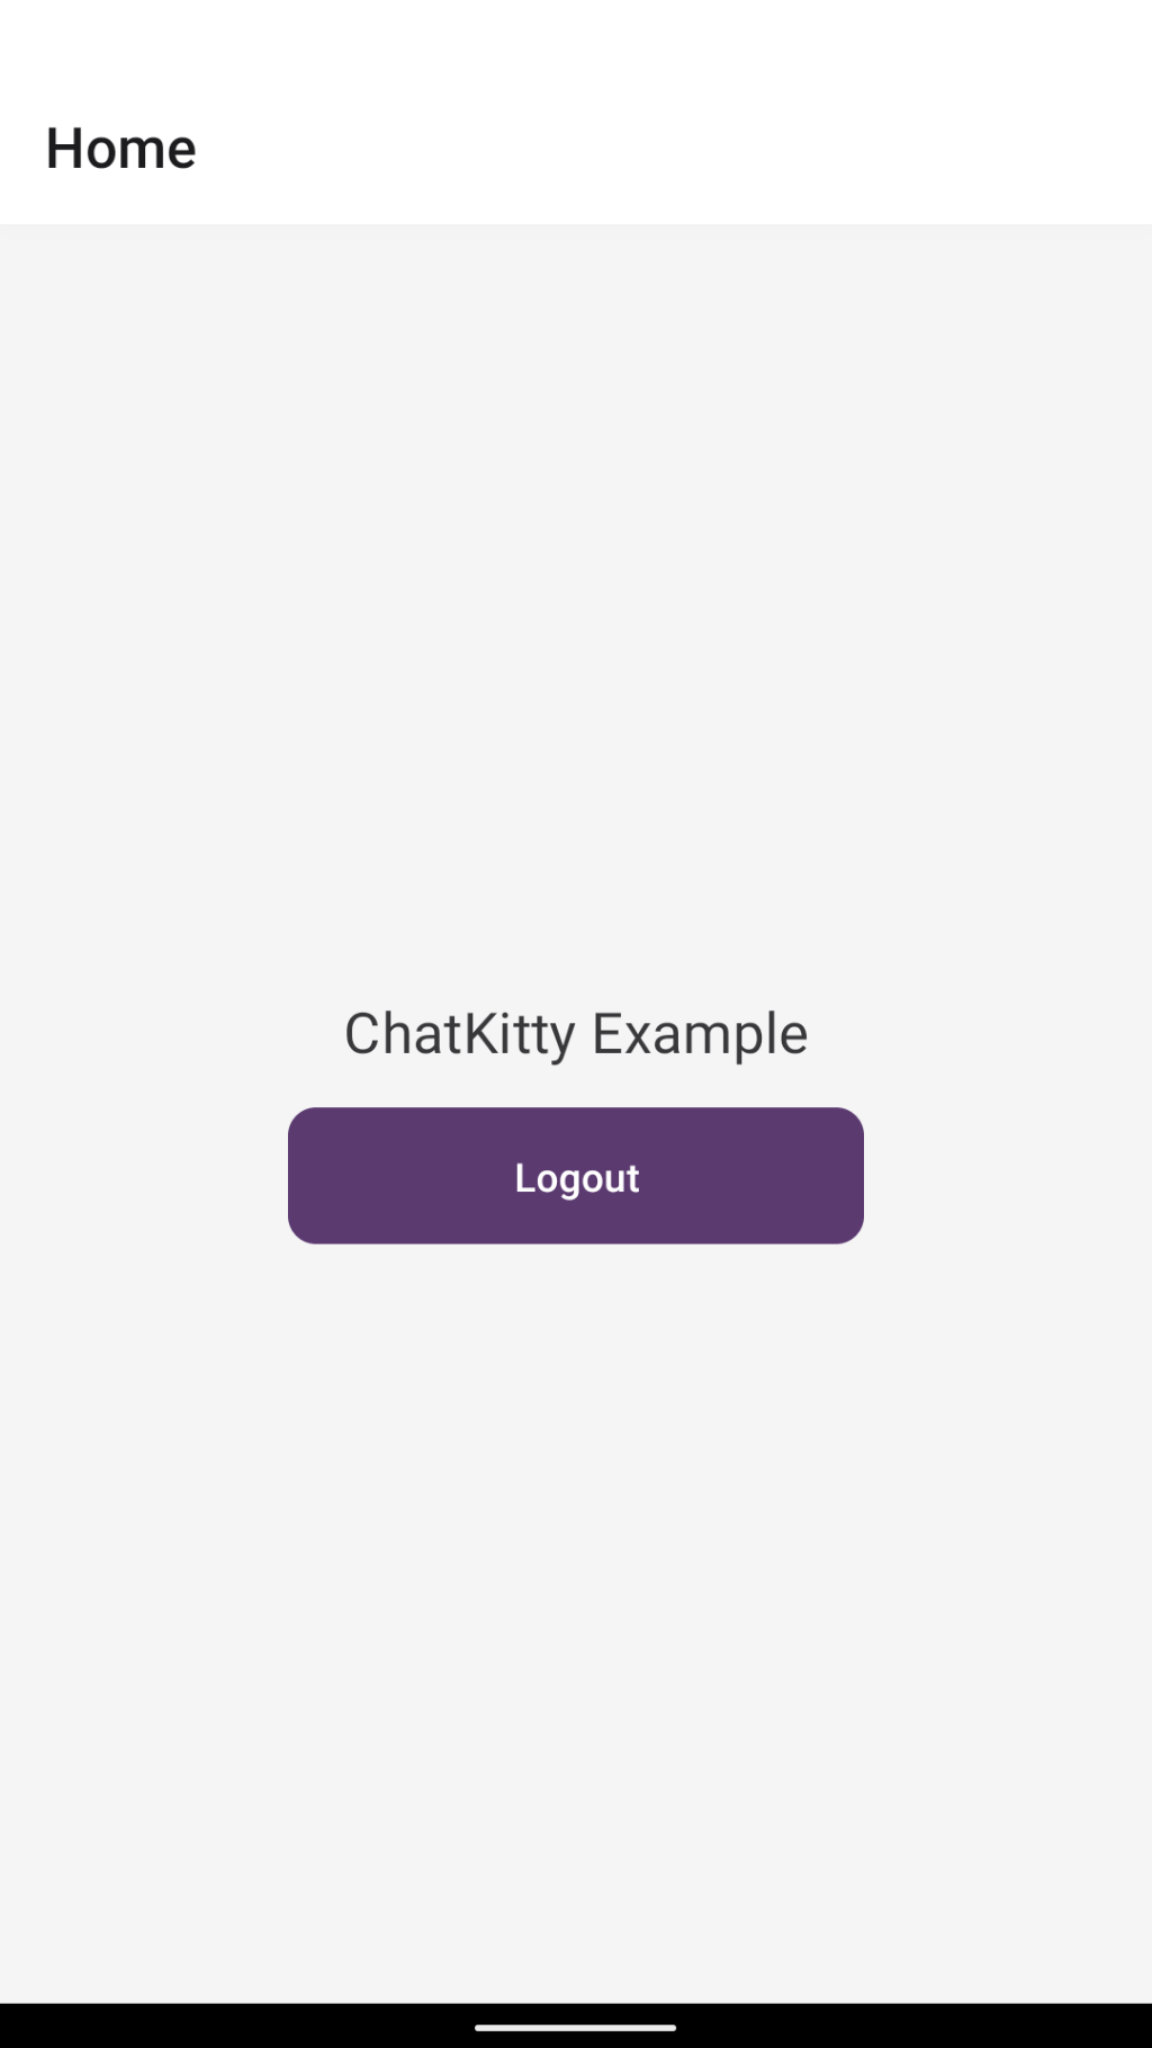
Conclusion
Awesome! You've completed the first part of this tutorial series and successfully implemented secure user authentication for your Expo React Native chat app, using Firebase and powered by the ChatKitty chat platform. By defining your authentication logic in a chat function while delegating user credentials checking to Firebase, you were able to extend the ChatKitty login flow to handle your specific case, without having to build your own backend. In future parts of this series, we'll explore more features you can implement with chat functions like sending push notifications to a user's device when the user isn't online.
What's next?
In the next post of this series, we'll implement more chat features including creating discussion channels for users to discover, join and chat. Stay tuned for more. 🔥
If you have any questions, comments or need help with any part of this article, join our Discord Server where you can ask questions, discuss what you're working on, and I'll be more than happy to help.
You can find the complete source code for this project inside this GitHub repository.
👉 Checkout the other blog posts in this series:
Building a group chat screen with the Gifted Chat React Native library
Adding direct messaging, typing indicators and chat presence notifications
This article contains materials adapted from "Chat app with React Native" by Aman Mittal, originally published at Heartbeat.Fritz.Ai.
This article features an image by Volodymyr Hryshchenko.